Setting Up Unreal Engine
How to set up Unreal Engine to import assets into nanos world
Actuellement, tout notre workflow pour l'exportation de contenu passe par Unreal Engine, car les assets doivent être exportés et prêt de la bonne manière avant d'être accessibles par le jeu.
Little by little we are able to allow loading some assets without the need of cooking them through Unreal, such as the already supported Textures and Sounds.
La première étape pour créer vos propres assets, est de télécharger et d'installer Unreal Engine.
On Windows
On Windows, the download of Unreal Engine must be done from inside Epic Games Launcher. Please download and install it before proceeding to the Unreal installation:
- Open Epic Games Launcher.
- Access Unreal Engine tab.
- Open Library tab.
- Press
+and select the correct Unreal Engine version (currently nanos world is on5.5.X). - Press
Installand a Popup will appear. - Select an installation folder and press
Install.
Prerequisites
Since newer versions of Unreal, it's required to install some SDKs to be able to cook assets on it. You can install them directly by downloading from Microsoft websites, or using Visual Studio Installer if you already have it installed.
Windows SDK
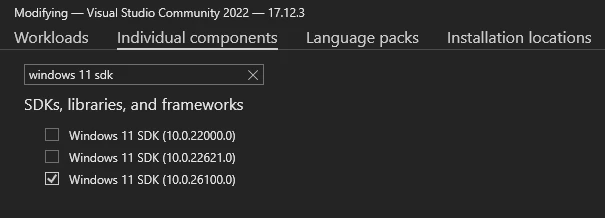
- (recommended) If you have Visual Studio installed, you can use Visual Studio Installer to install Windows 10 SDK through there. Just open the Individual components tab and install
Windows 11 SDK (10.0.26100.0):

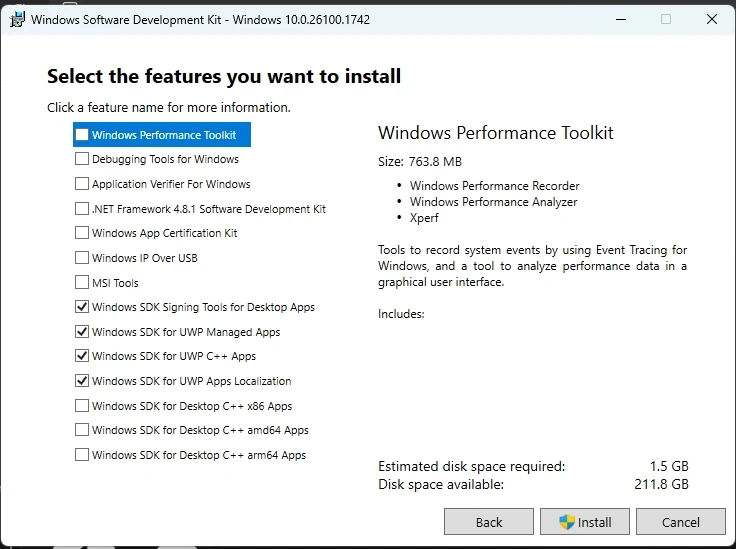
- Otherwise, you can install Windows SDK directly from Microsoft website and select
Download the Installer >:

On Linux
If you are on Linux, Epic Games is releasing standalone binaries which can be downloaded directly from their site. Download the latest Unreal Engine version here.
Next Steps
After downloading Unreal Engine, launch it once to finish the engine installation.
And you are ready to proceed to the next step to download and use the Assets Development Kit!