Creating Custom Maps
How to create and export maps from Unreal to nanos world
Maps and Levels are quite the most straightforward asset that you can create and import. In Unreal, maps are called Levels, usually these levels are filled with a Landscape component to make the terrain, some Lights and some Static Meshes (Trees, Houses, etc).
Please refer to Unreal’s Official tutorial - Working with Levels.
Attention! This page is old and this tutorial may be outdated! The images here reference to Unreal Engine 4 and may have changed. A new updated tutorial will come soon™!
Rules for creating a Map/Level
- Do not spawn/place Dynamic Meshes (with Physics), as they will not be synced in-game. You need to spawn them as a Prop through the scripting.
- Add a “Sun” actor-tag to all Lighting/Sky/Sun related actors (DirectionalLight, SkyLight, DomeMesh, SkyAtmosphere or SunSky), this will allow, if wanted, to your light to be overridden by scripters to use, instead, the Official nanos world Sun through
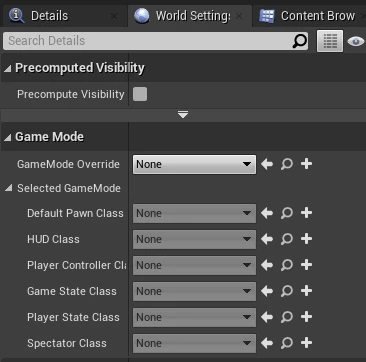
World.SpawnDefaultSun(), which allows in-game light/sun customization. - If you are creating a Map, please remember to nullify (set to None) all references it has for Unreal GameModes Override in the World Settings:
Getting Started
Before proceeding, please make sure you read Creating & Importing Assets Guide.
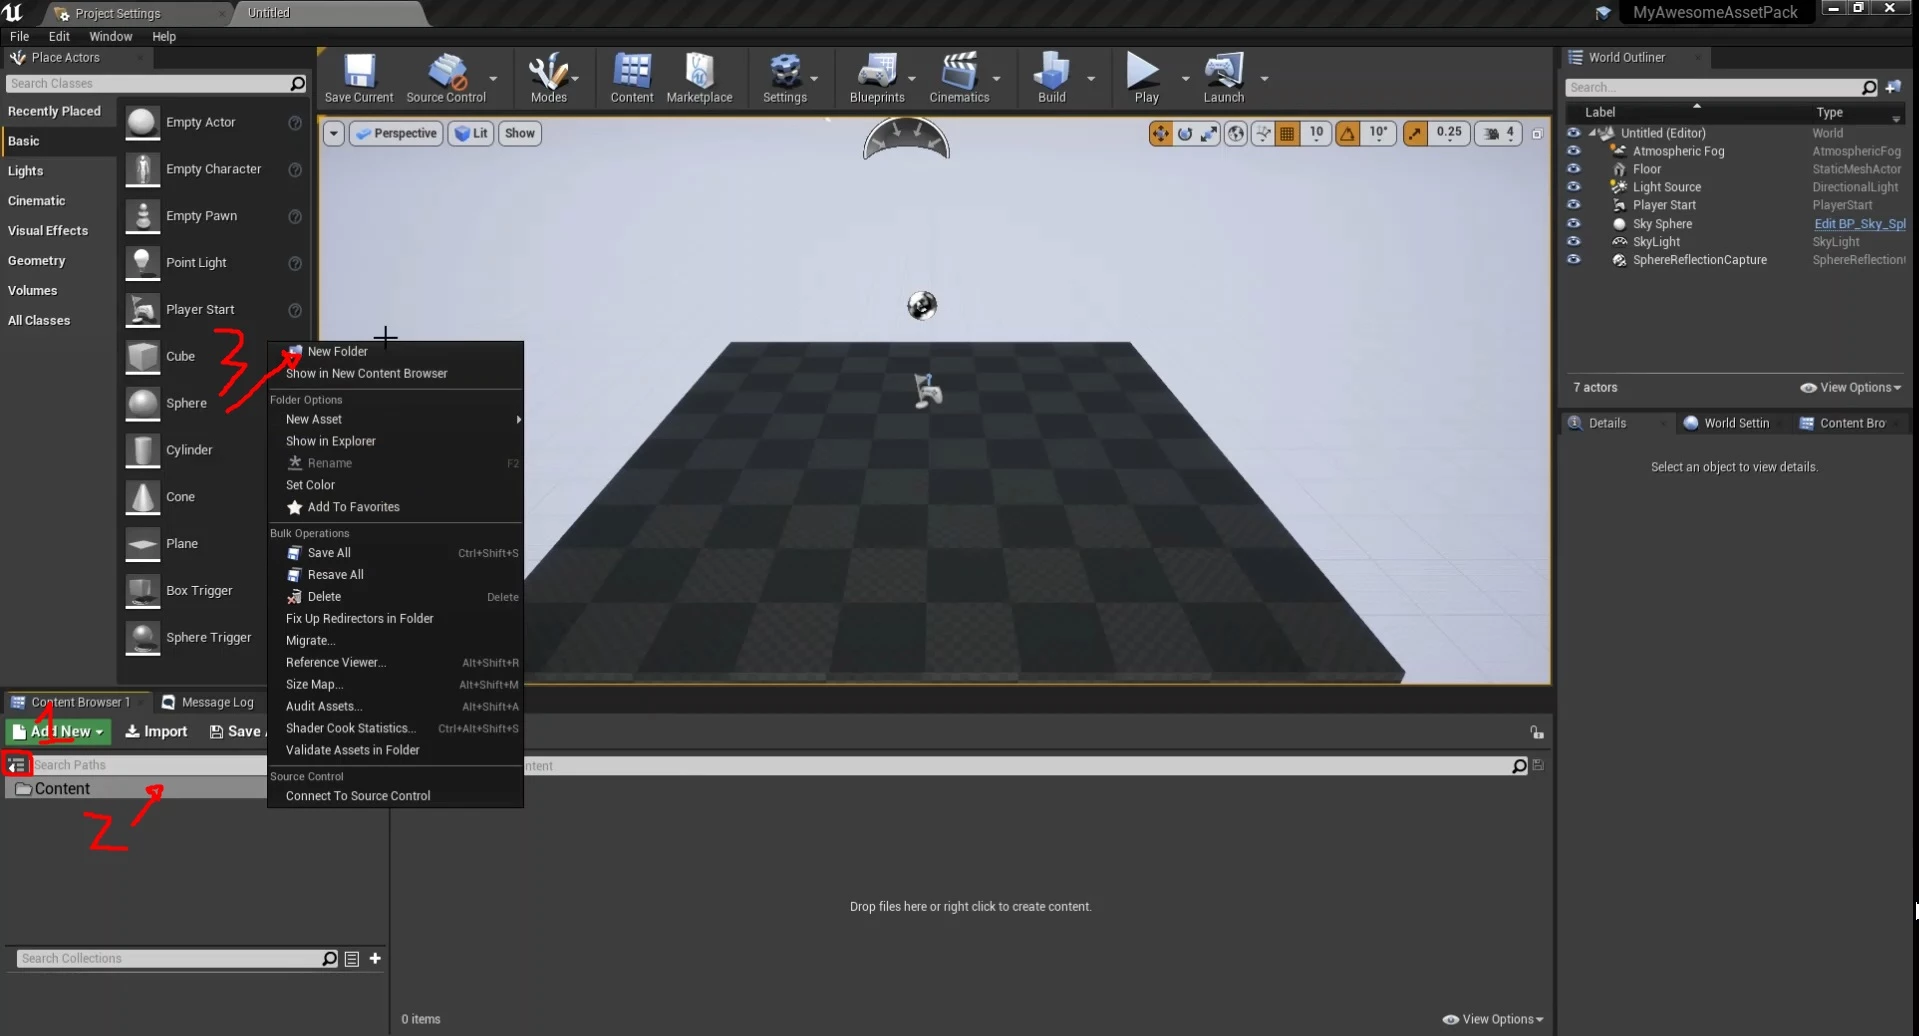
The first step is to create a folder inside the Content/ folder, this step is very important. Name this folder as you wish.
- Expand the tab.
- Right click on Content.
- Create a New Folder.

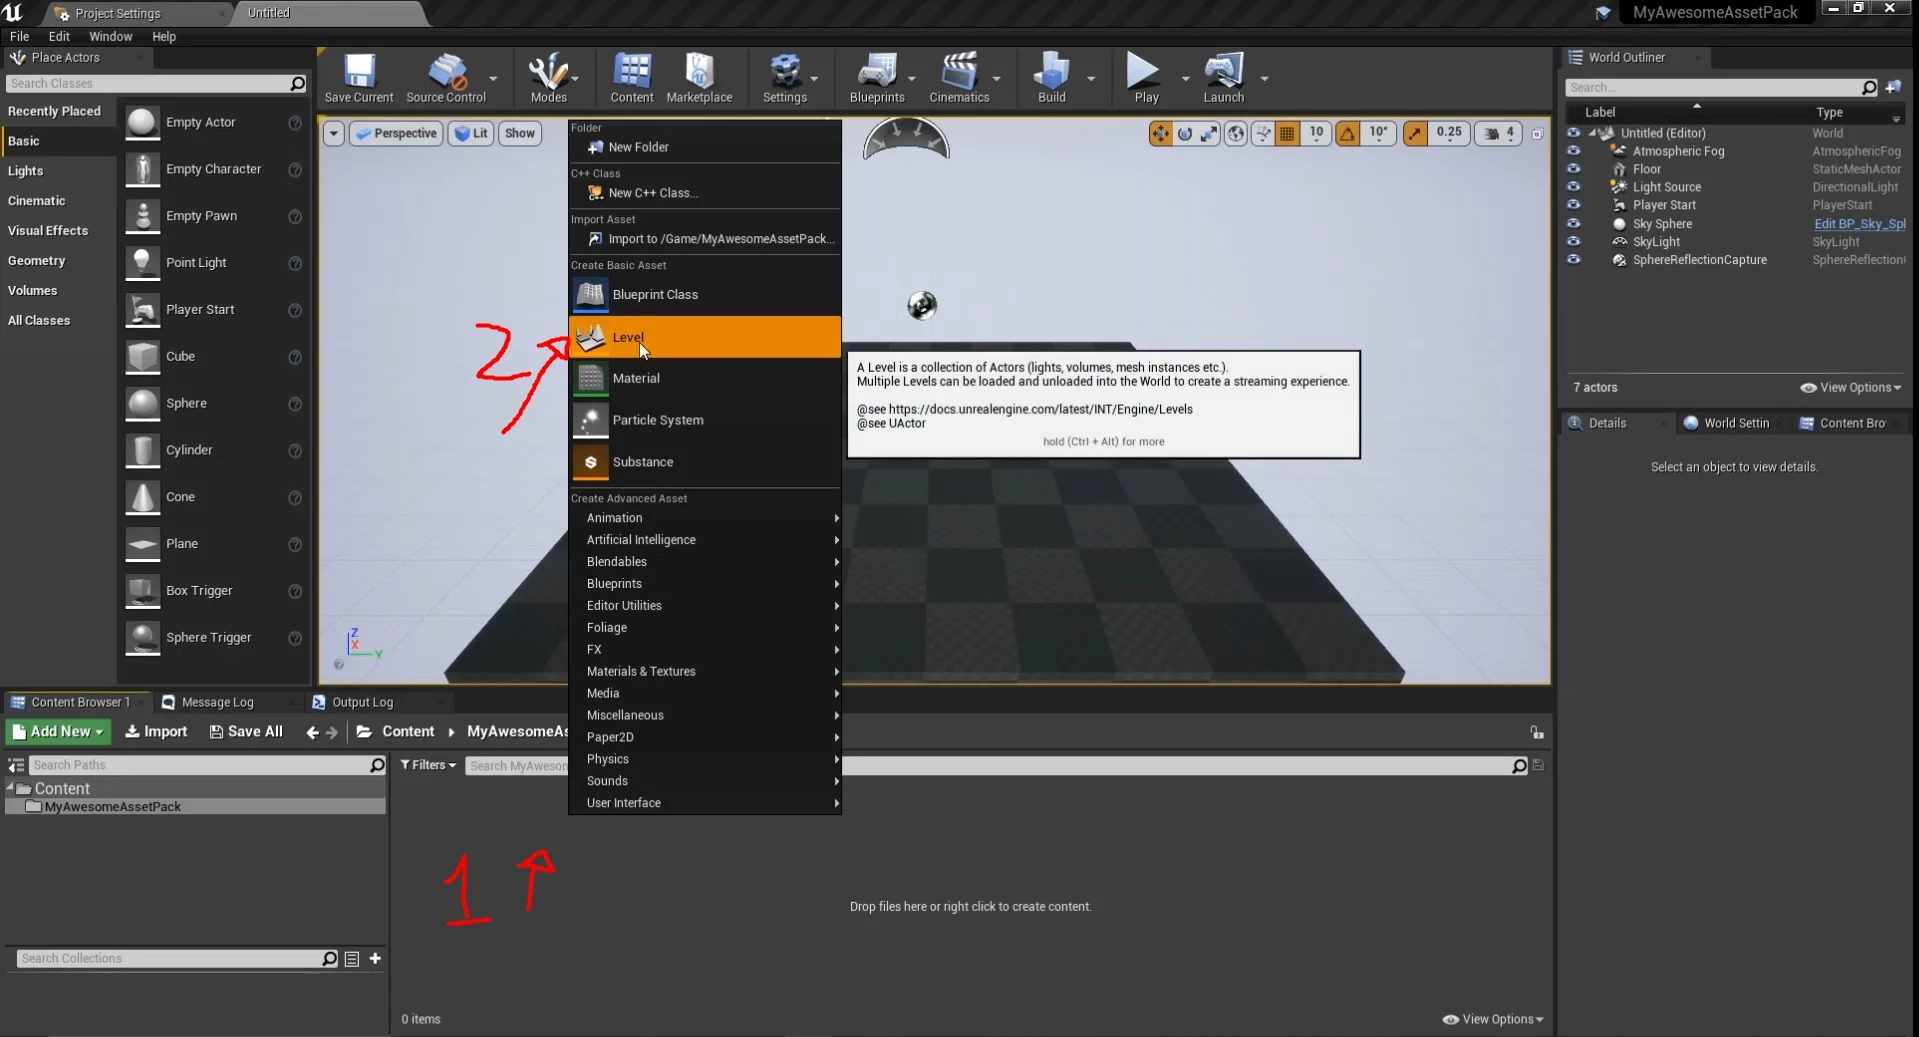
Now let’s create the Map itself, in Unreal maps are called Levels, to do so:
- Right click on the Content space.
- Create a new Level.
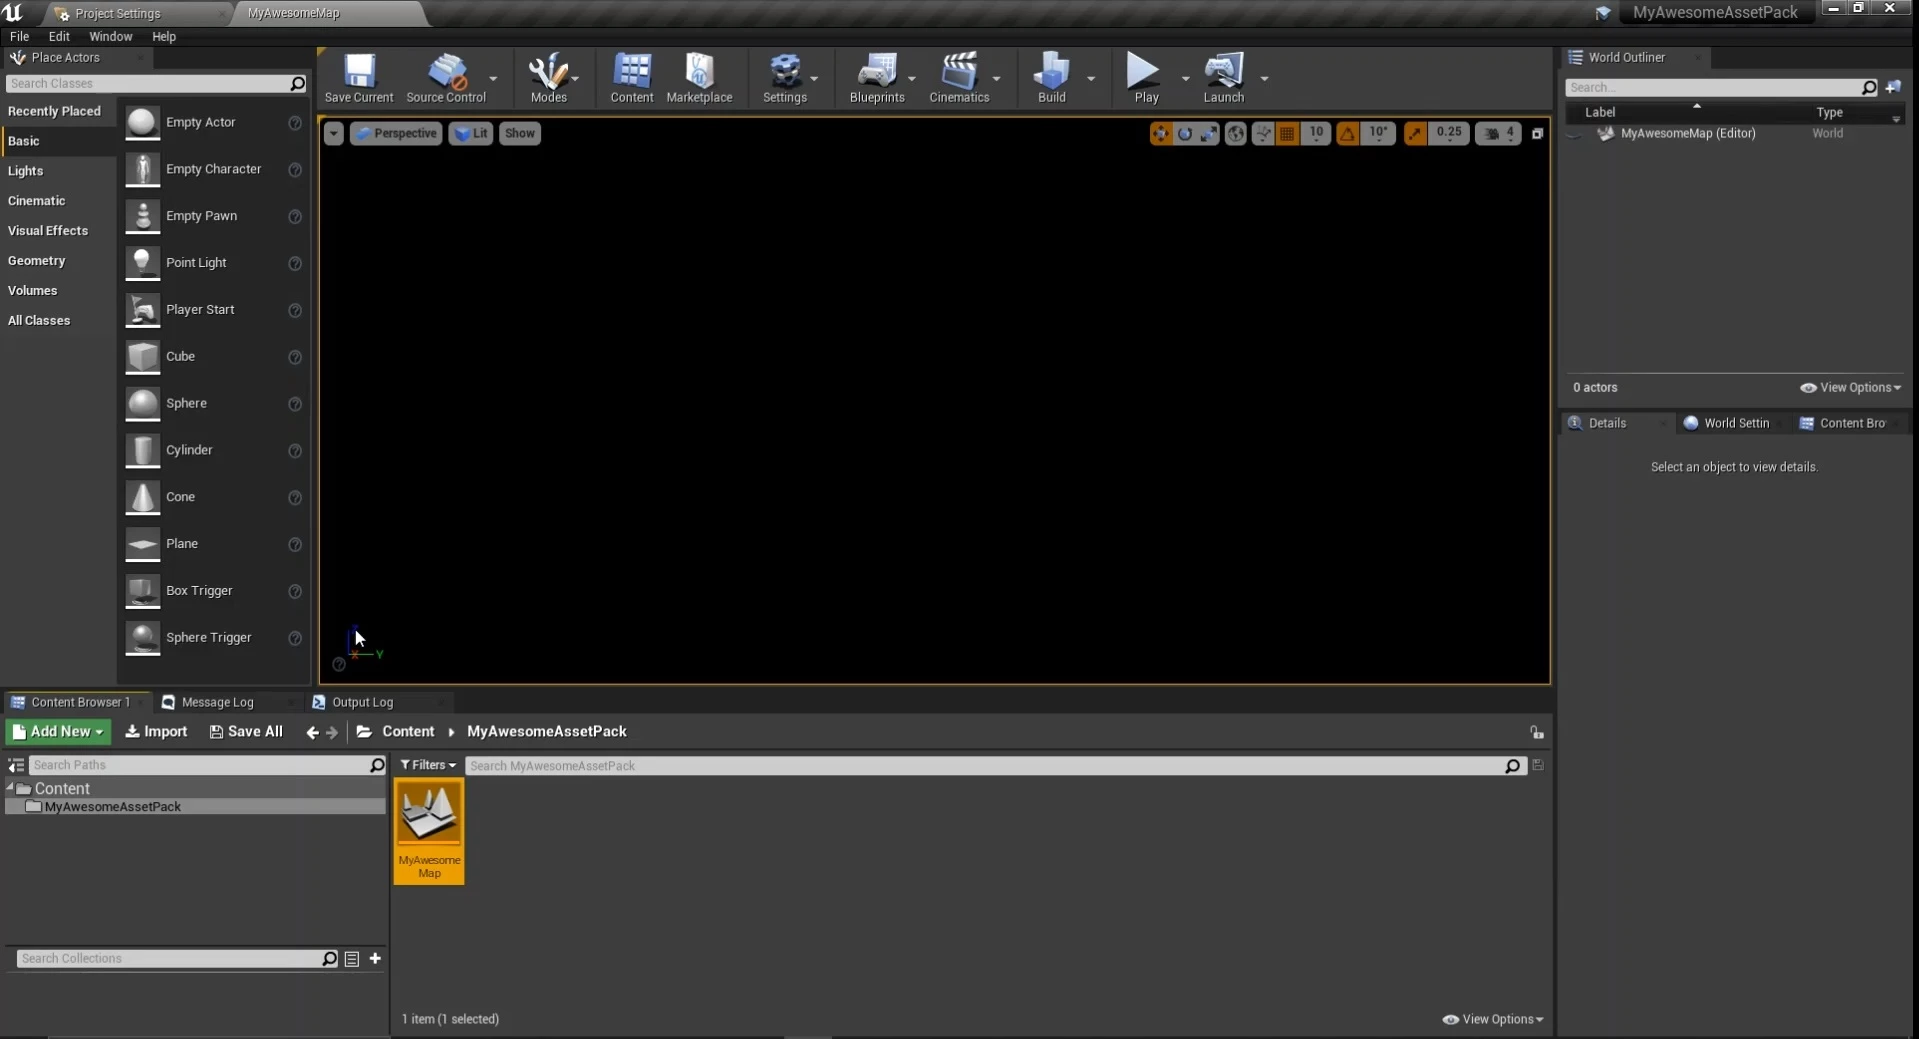
Rename it with the map name you desire, save it and open it up. You will notice the Viewport got black, this is because the Map you just opened doesn’t have anything, let’s add some stuff into it:
Adding Objects
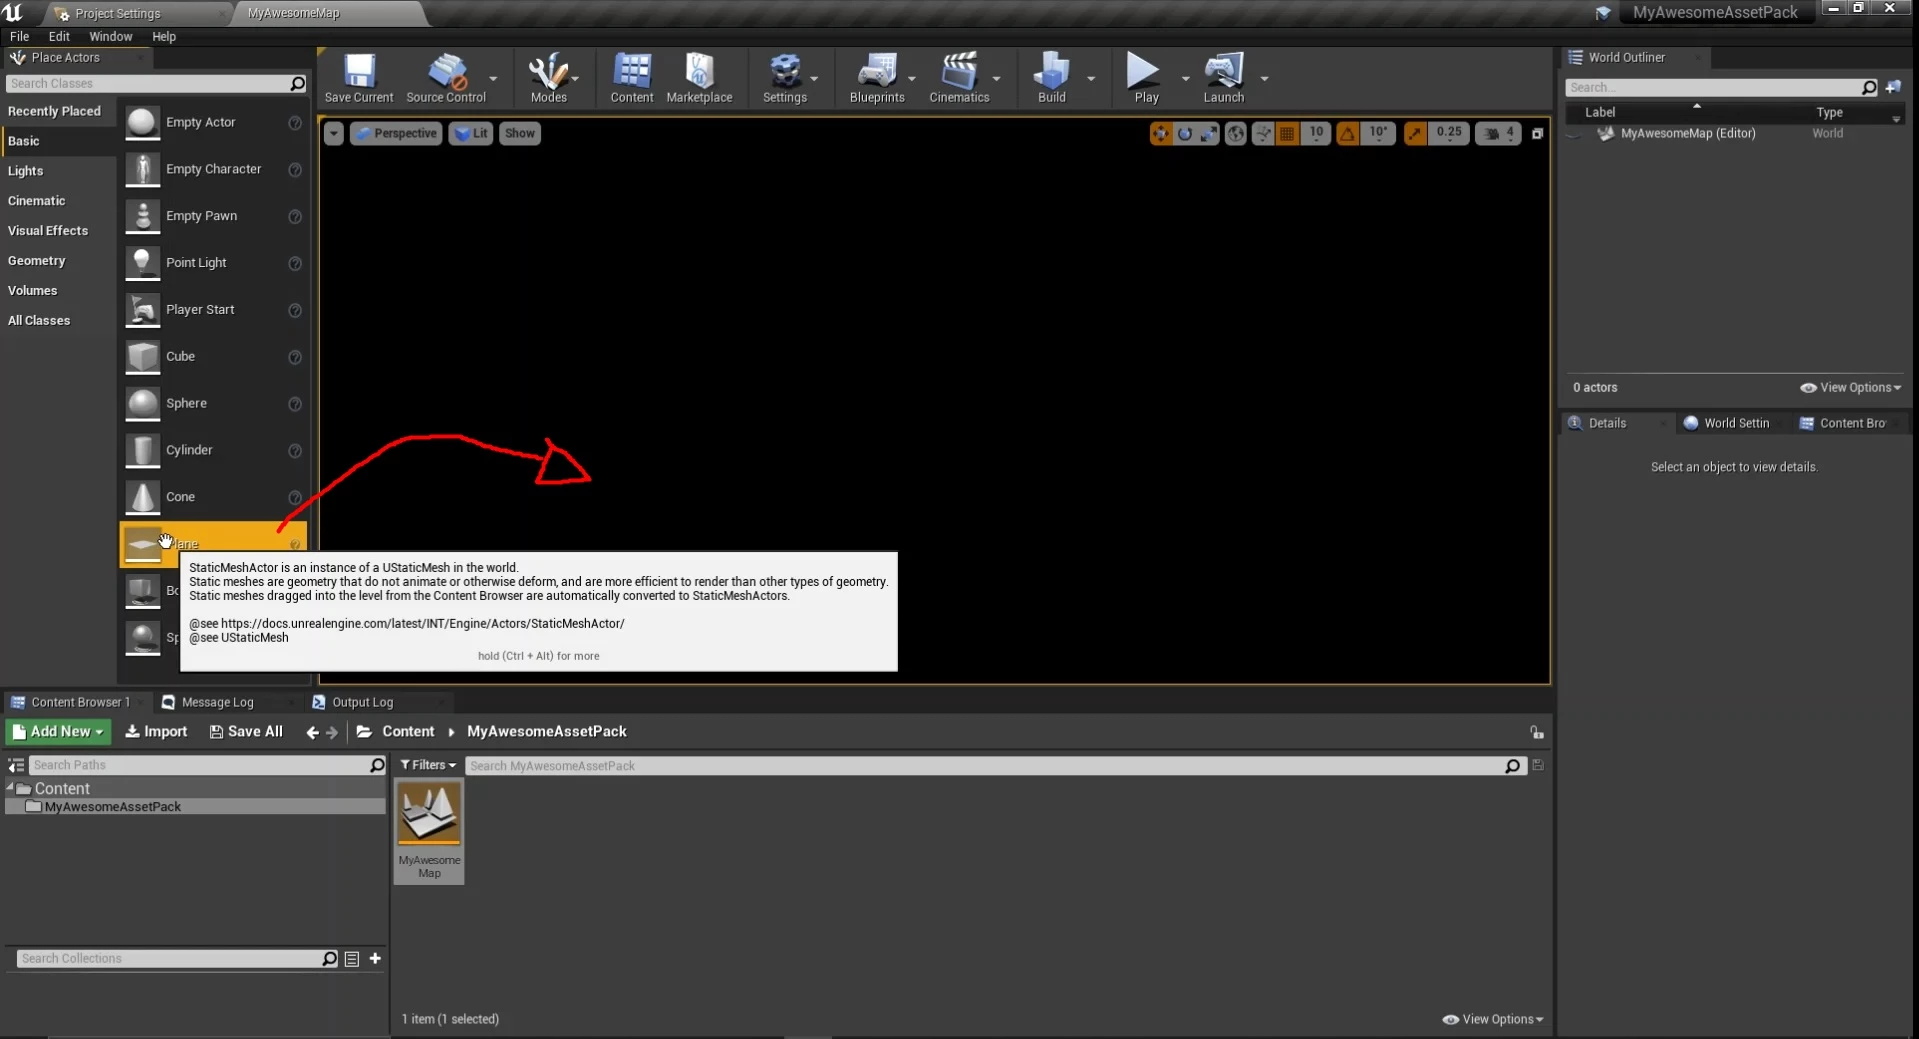
First let’s add a floor, for that just drag-and-drop a Plane from Place Actors -> Basic window into the Viewport:
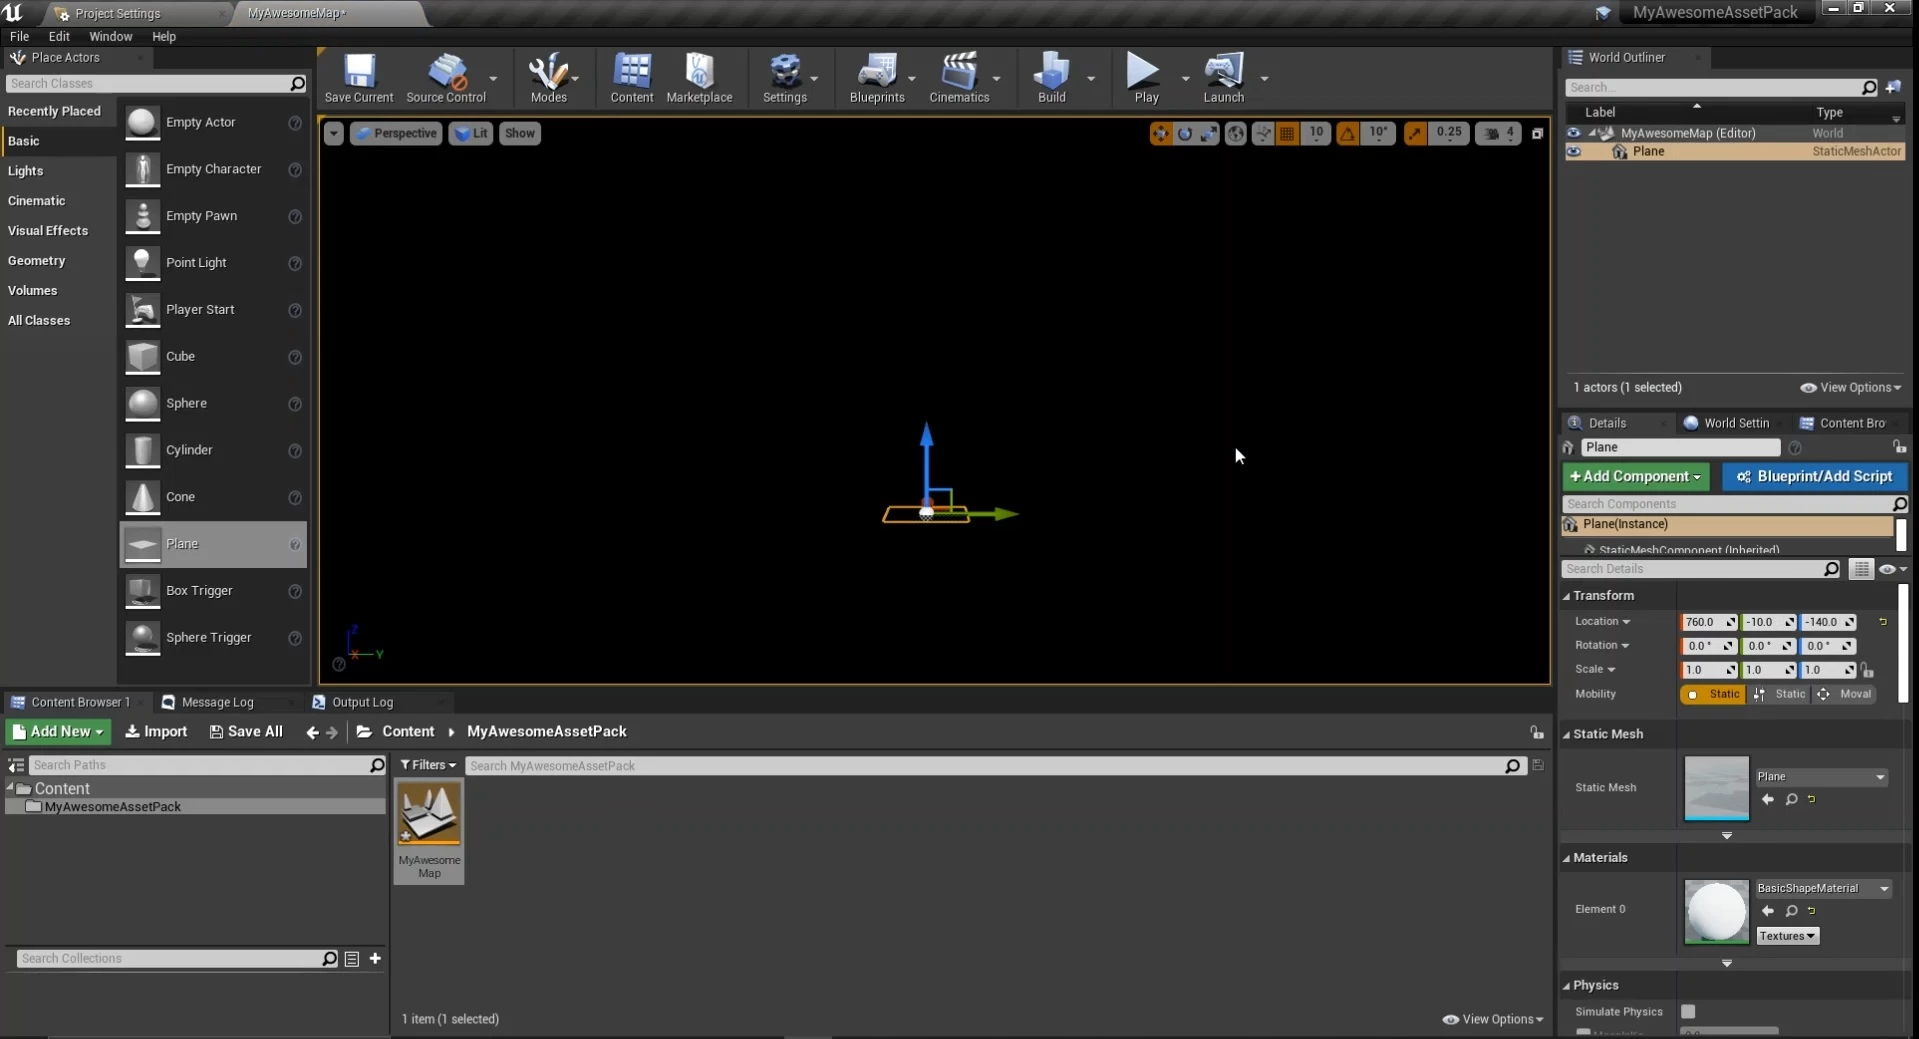
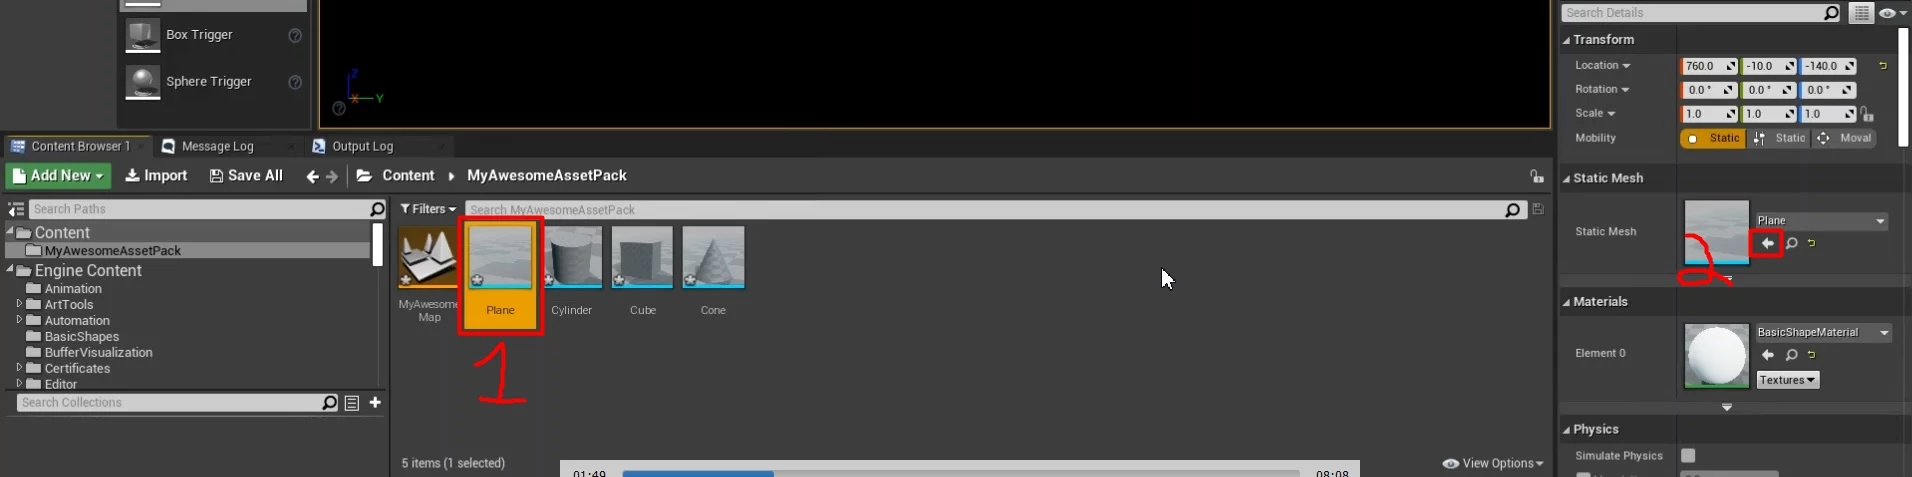
With the plane selected, you will notice it is a simple Static Mesh, this Static Mesh is a model already included in the Engine, so it is important that you copy this Mesh to your Content/YourAssetPack/ folder to avoid any further export problem:
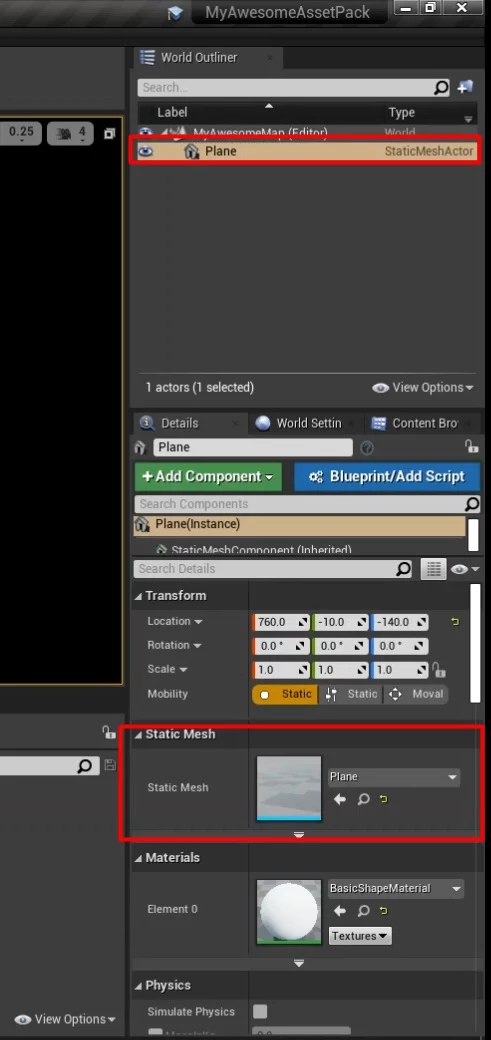
To find where your Mesh is located, press the magnifying glass at the right of the Static Mesh item at the right of the screen:

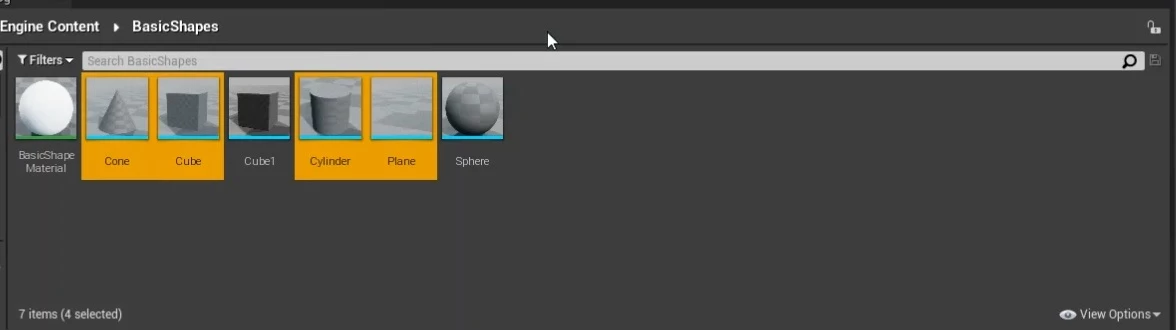
This will open the Engine’s folder which contains some Basic meshes which come with the Engine:

Let’s copy some Basic Meshes into our AssetsPack folder to be used later, including the Plane:
Use CTRL+C + CTRL+V to copy the assets into your folder:

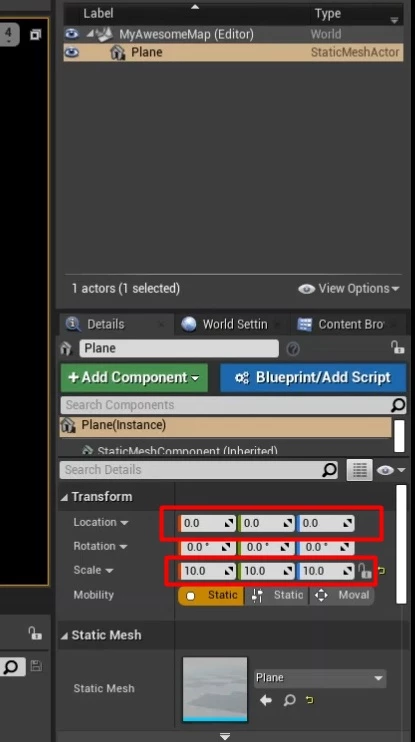
Now let’s replace the plane mesh we were using to our copied mesh, for that, just
- Select the copied Plane mesh.
- Press the arrow on your Plane Actor to replace it’s Static Mesh (alternatively you can just Delete the spawned Plane and drag and drop the new Plane from your assets pack’s folder):
After that, with your Plane (floor) selected, let’s just scale it to X = 10, Y = 10, Z = 10 and centralize it on X = 0, X = 0, X = 0:
We can also add some lights, for that, just drag and drop a Directional Light (Sun Light/Shadows) and a Sky Light (Shadow’s Color) into your level (you can fly around with Right Click + WASD in the viewport, or press F to centralize the Plane - if selected):

Adding Materials
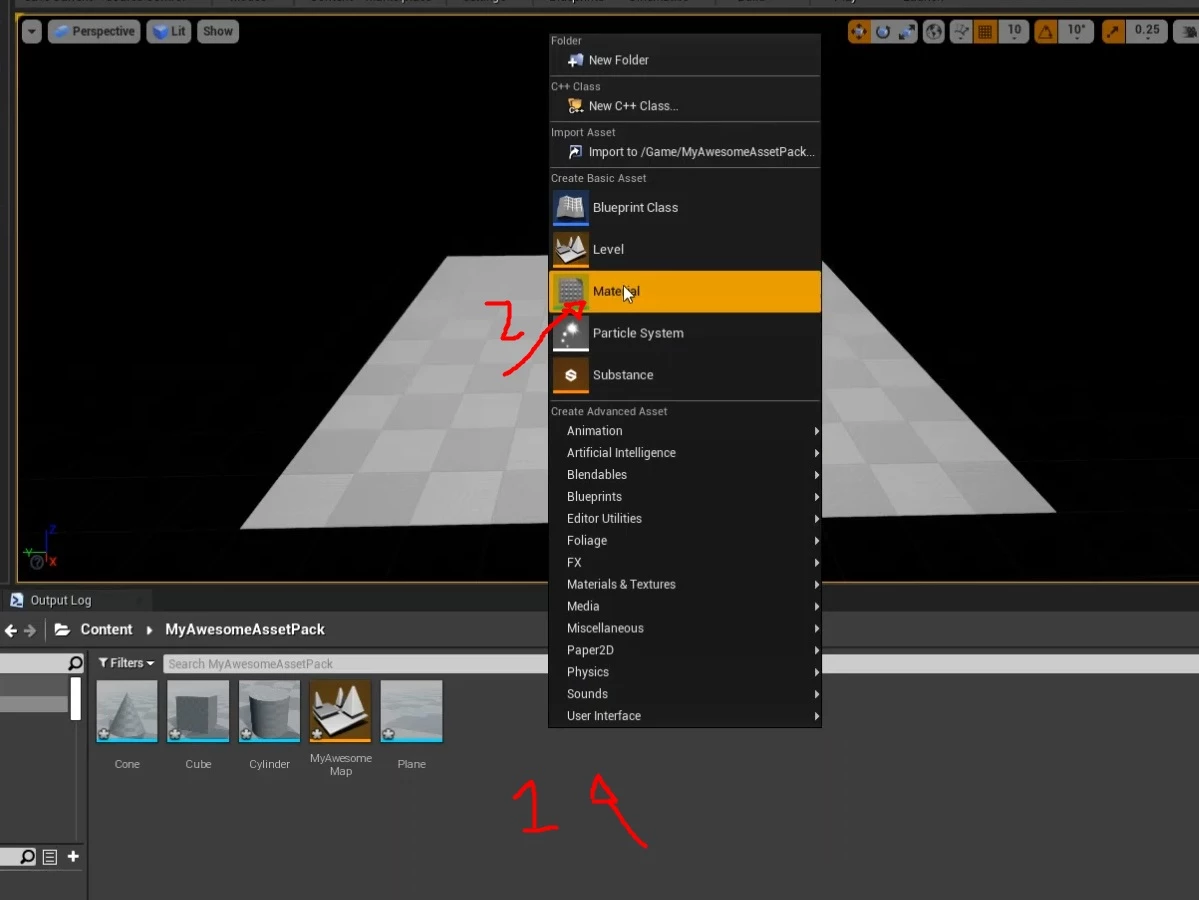
Great job, now we can see the stuff! Now let’s add some color to it, applying color and textures in Unreal are made through Materials, for that, let’s just create a Material
- Right Click.
- Create new Material.
Rename it to M_Plane and open it up:
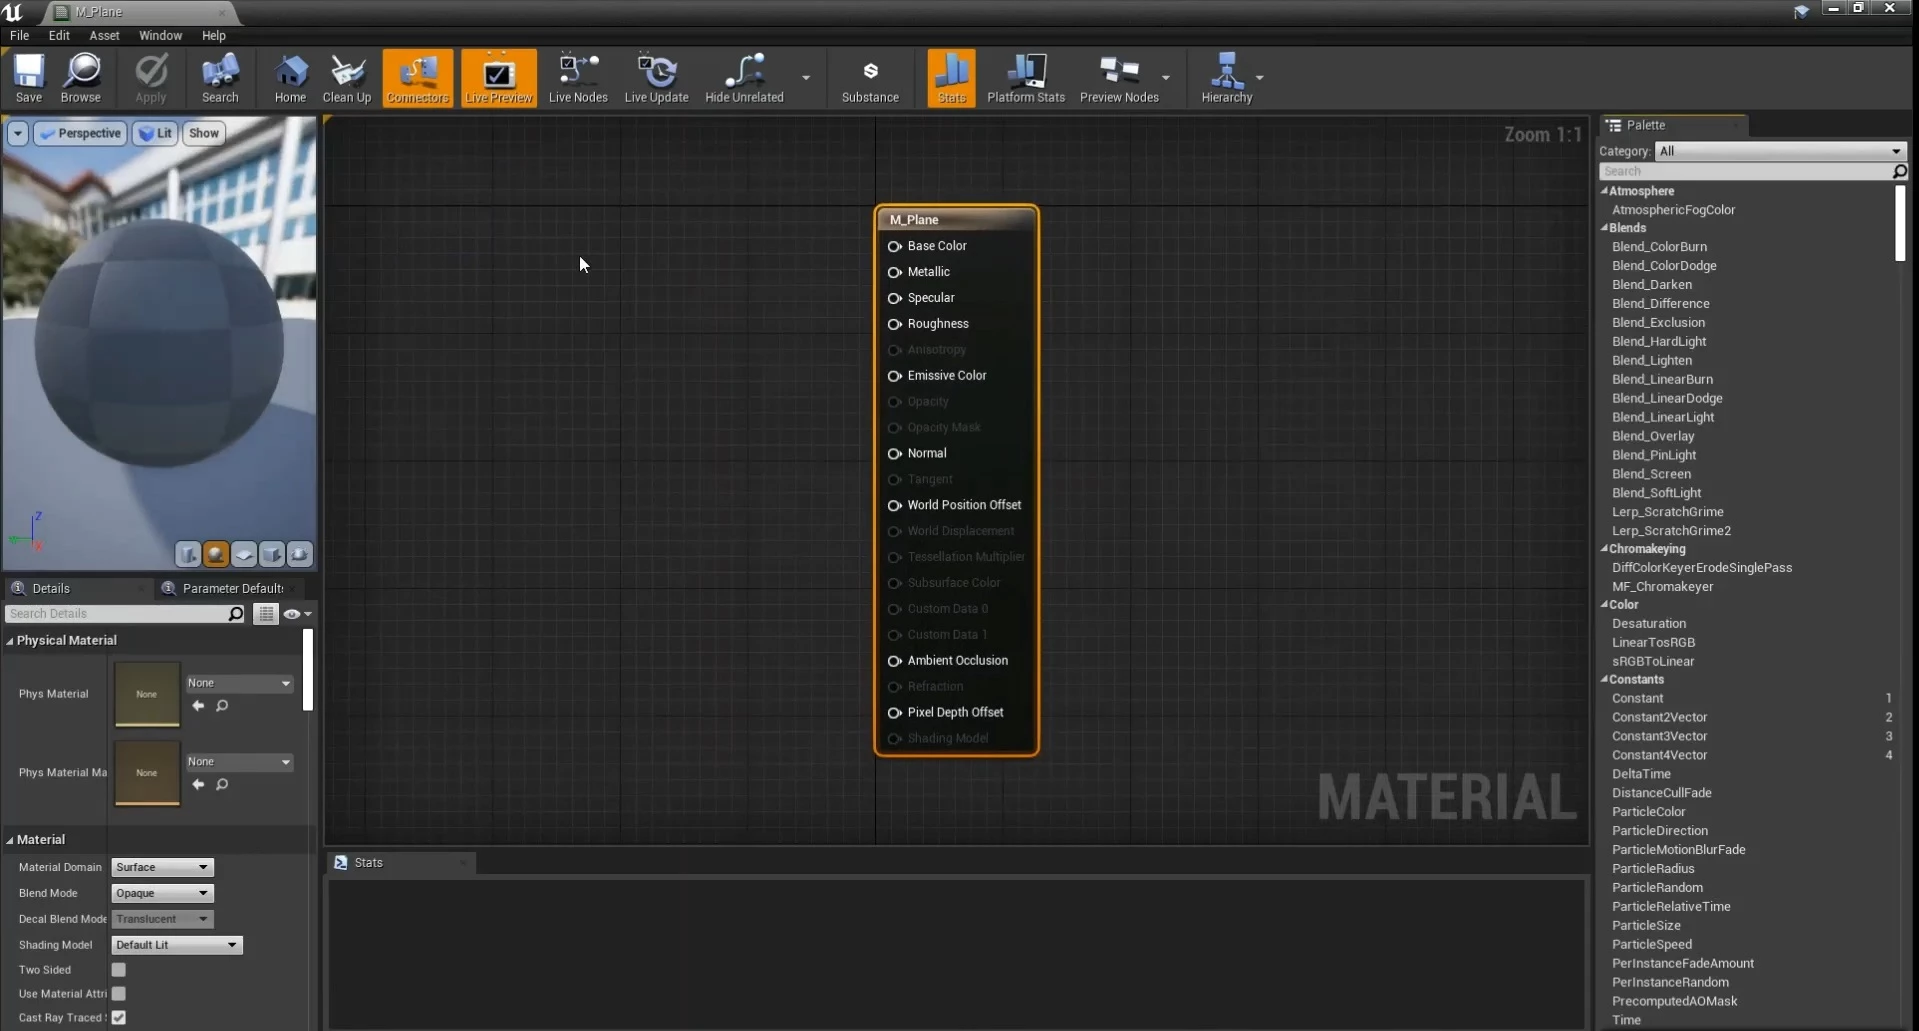
We won’t cover all aspects of Materials in this tutorial, for now let’s just pin a Vector3 node with a color into Base Color input, for that Right Click on the screen and search for Constant3Vector:
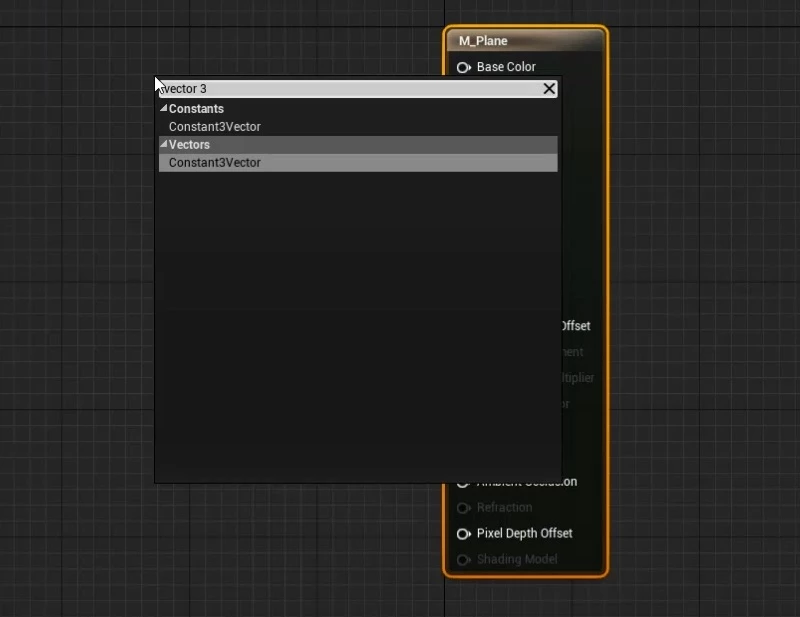
After that, pin it into Base Color input:
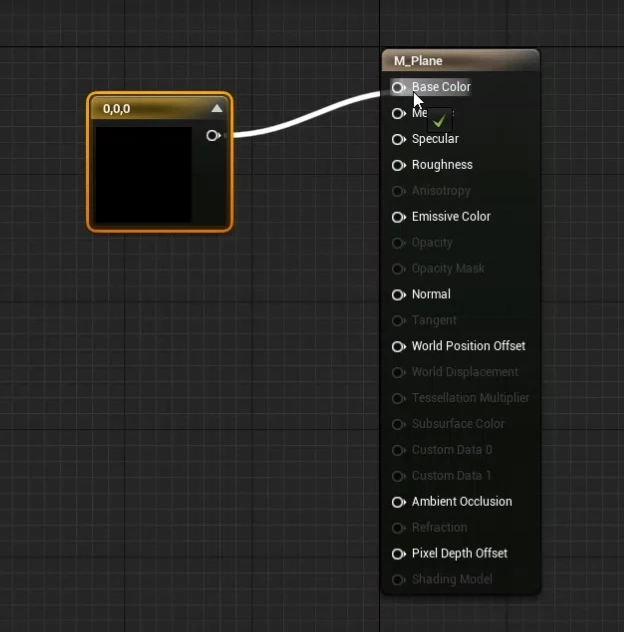
Select the Vector3 node and select a color for it:

Now save and close this Material window, and you are able to drag and drop your material into the Mesh you want, let’s do it for the Plane:
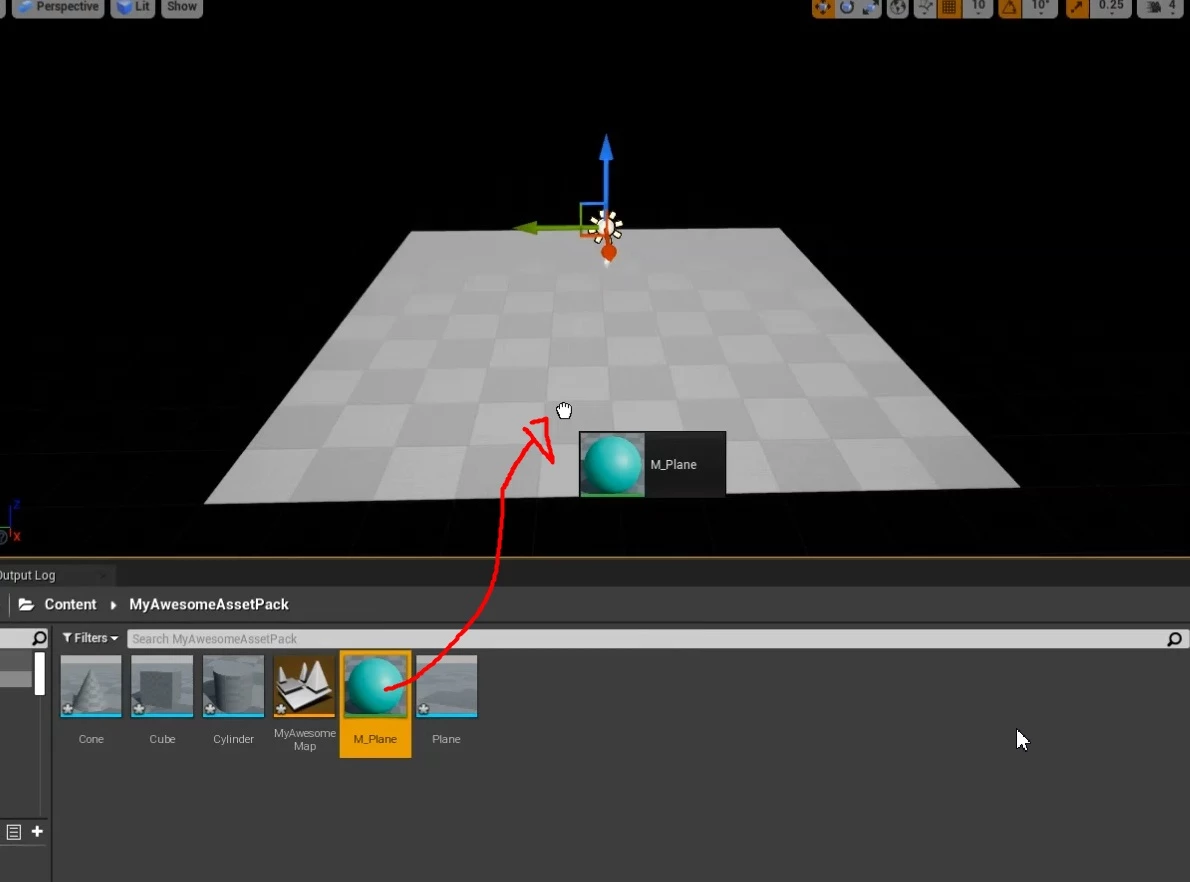
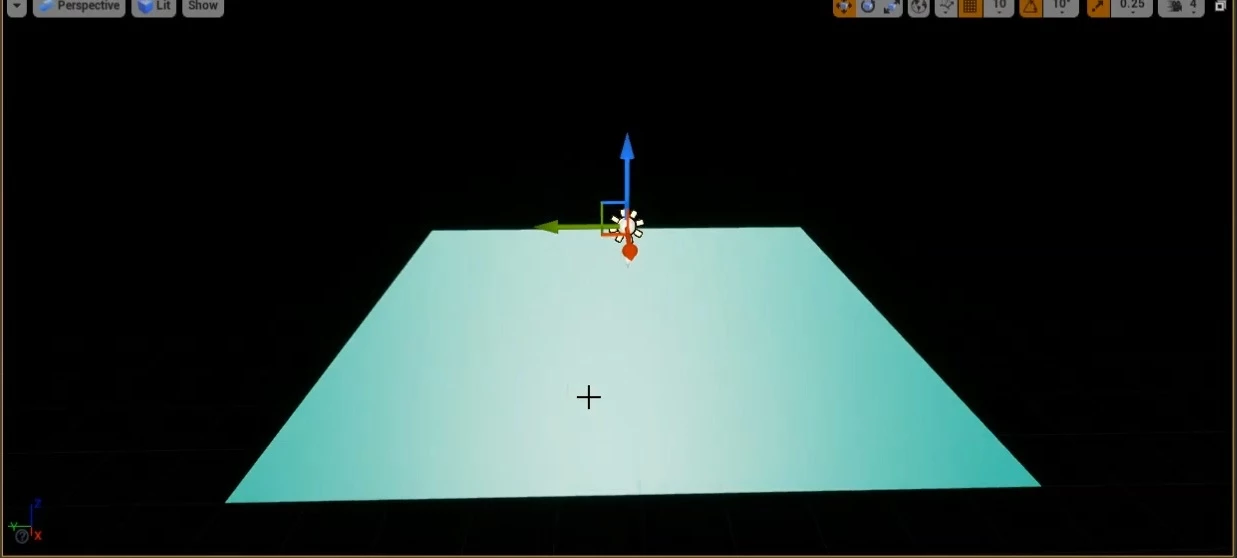
And voila, it gets greenish (or the color you selected in the Plane’s Material screen)!
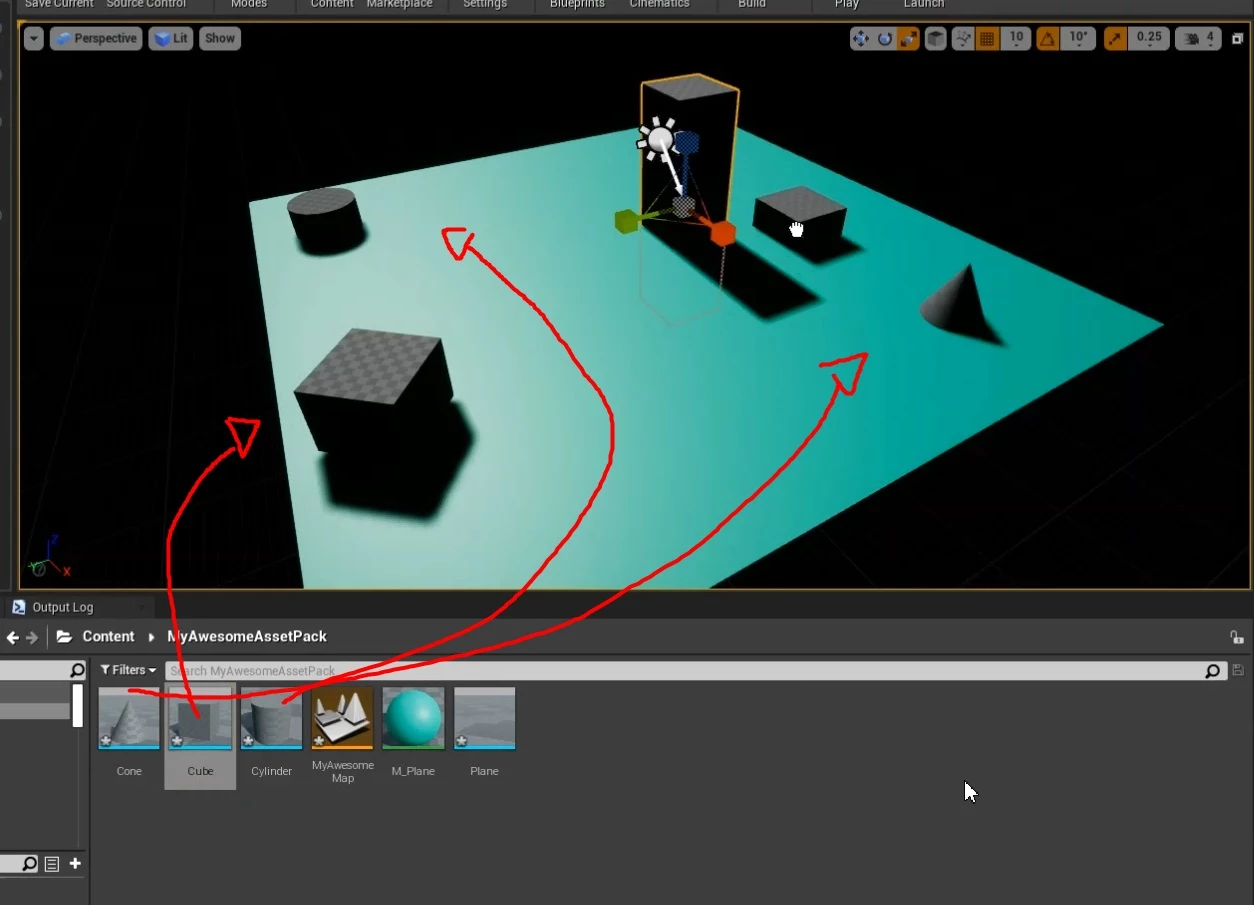
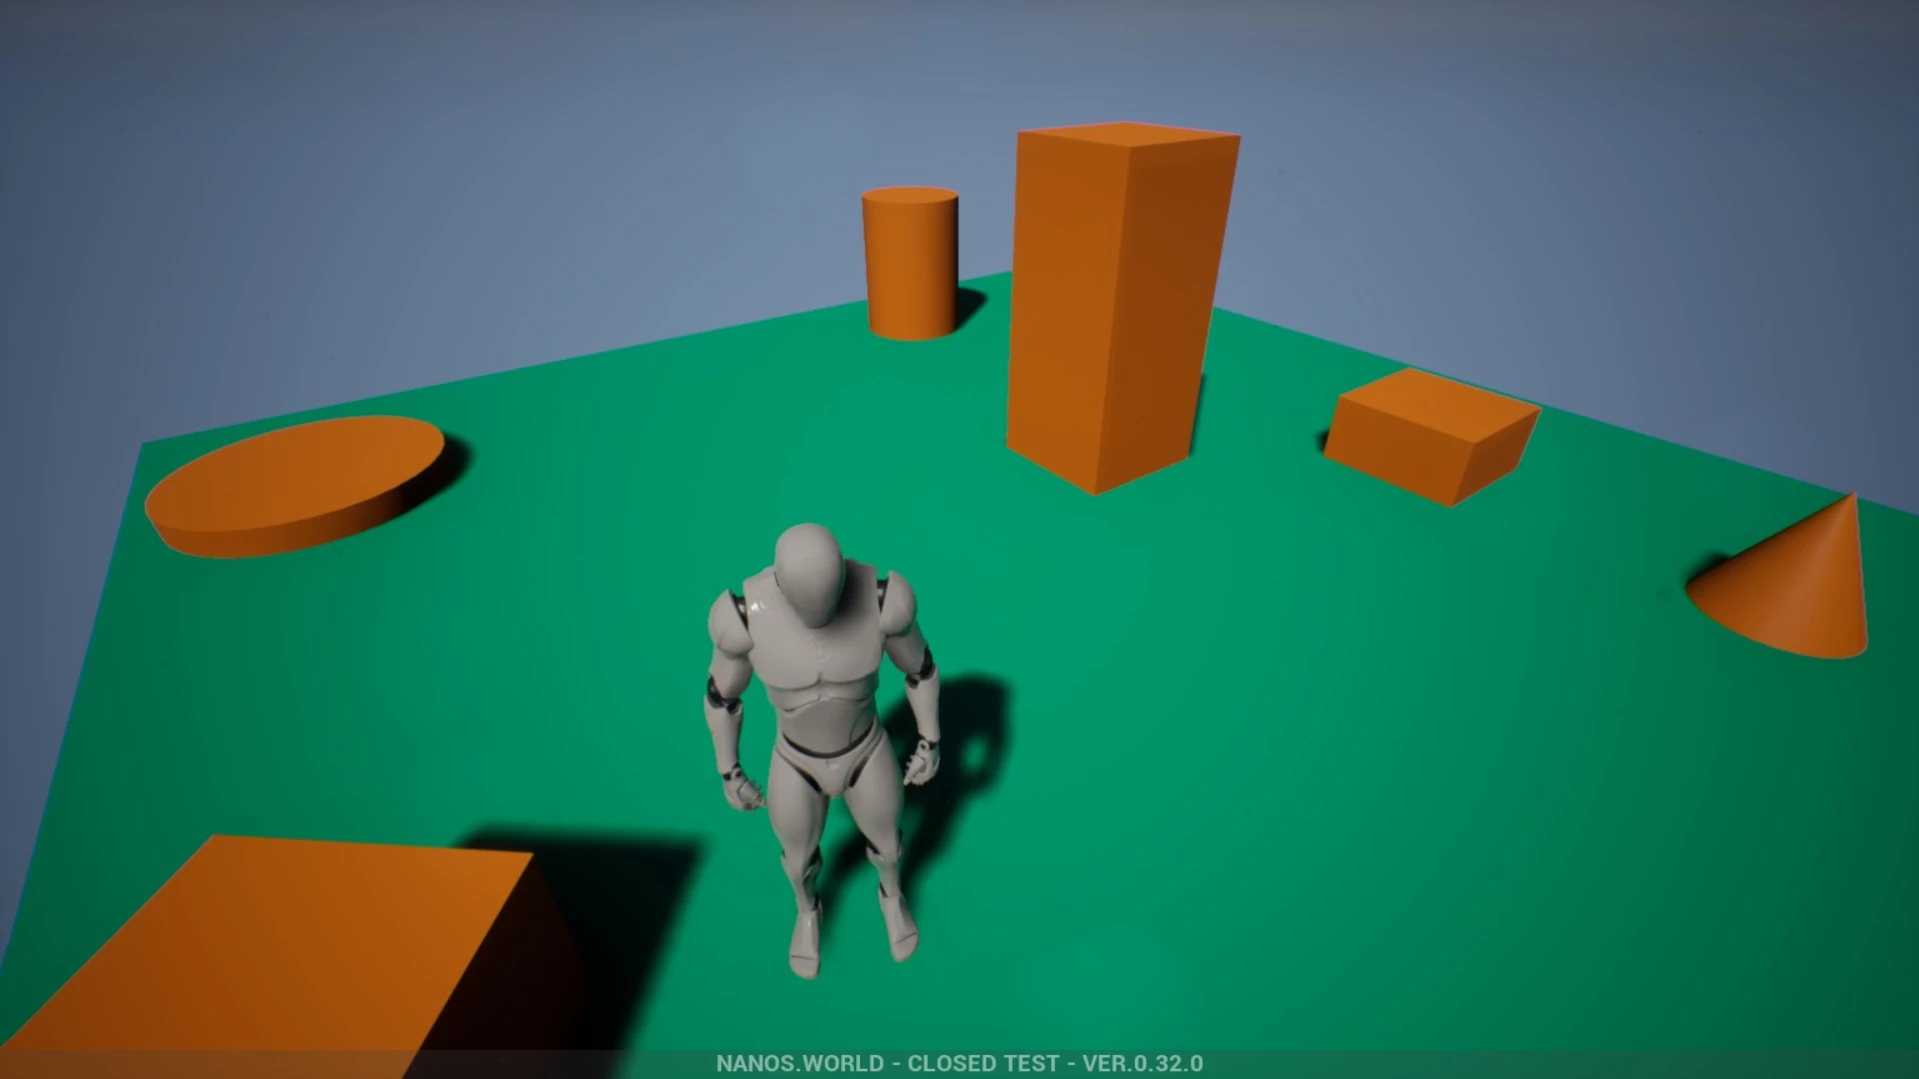
Now let’s drag’n drop other Meshes into our Level, like so:
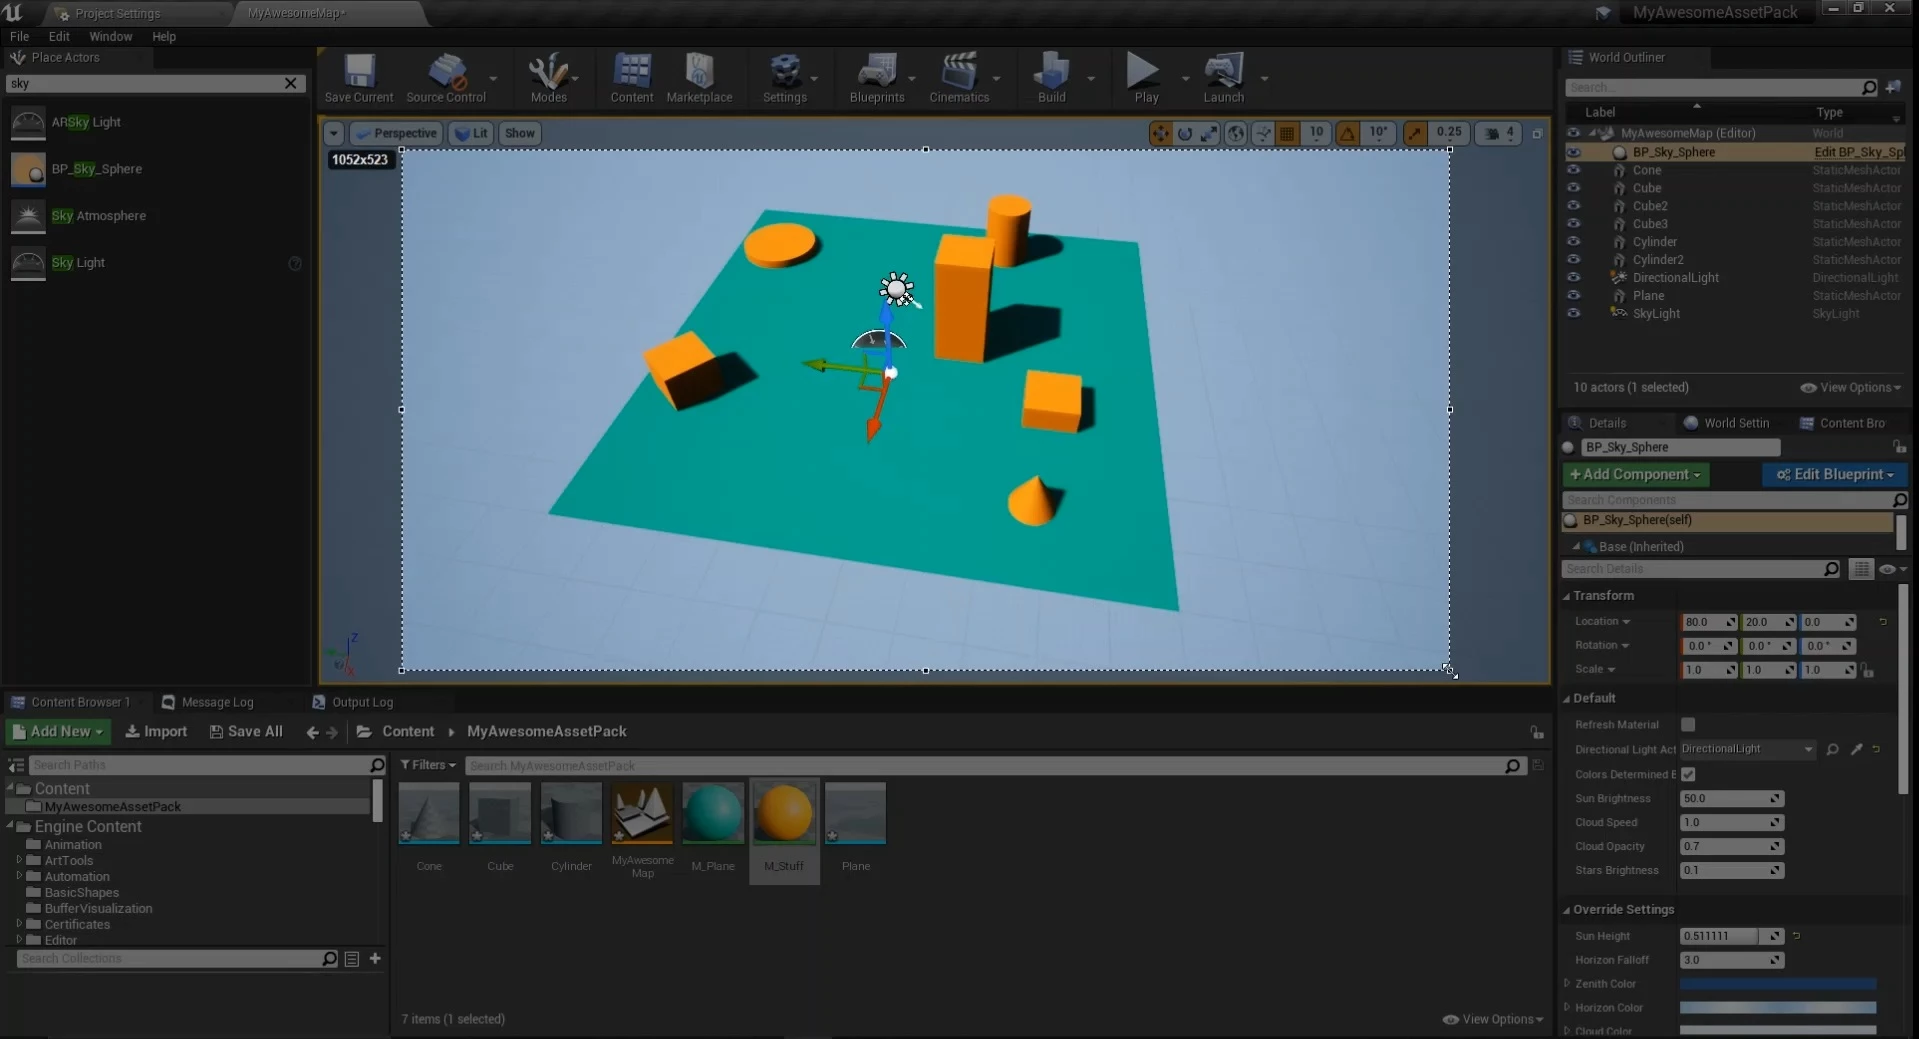
Also, the ADK project provides a built-in Sun & SkyBox Actor (to fill up the sky with color and clouds), to add it, just look into NanosWorld/Blueprints/World/ for BP_SunSky and drag it to the viewport.
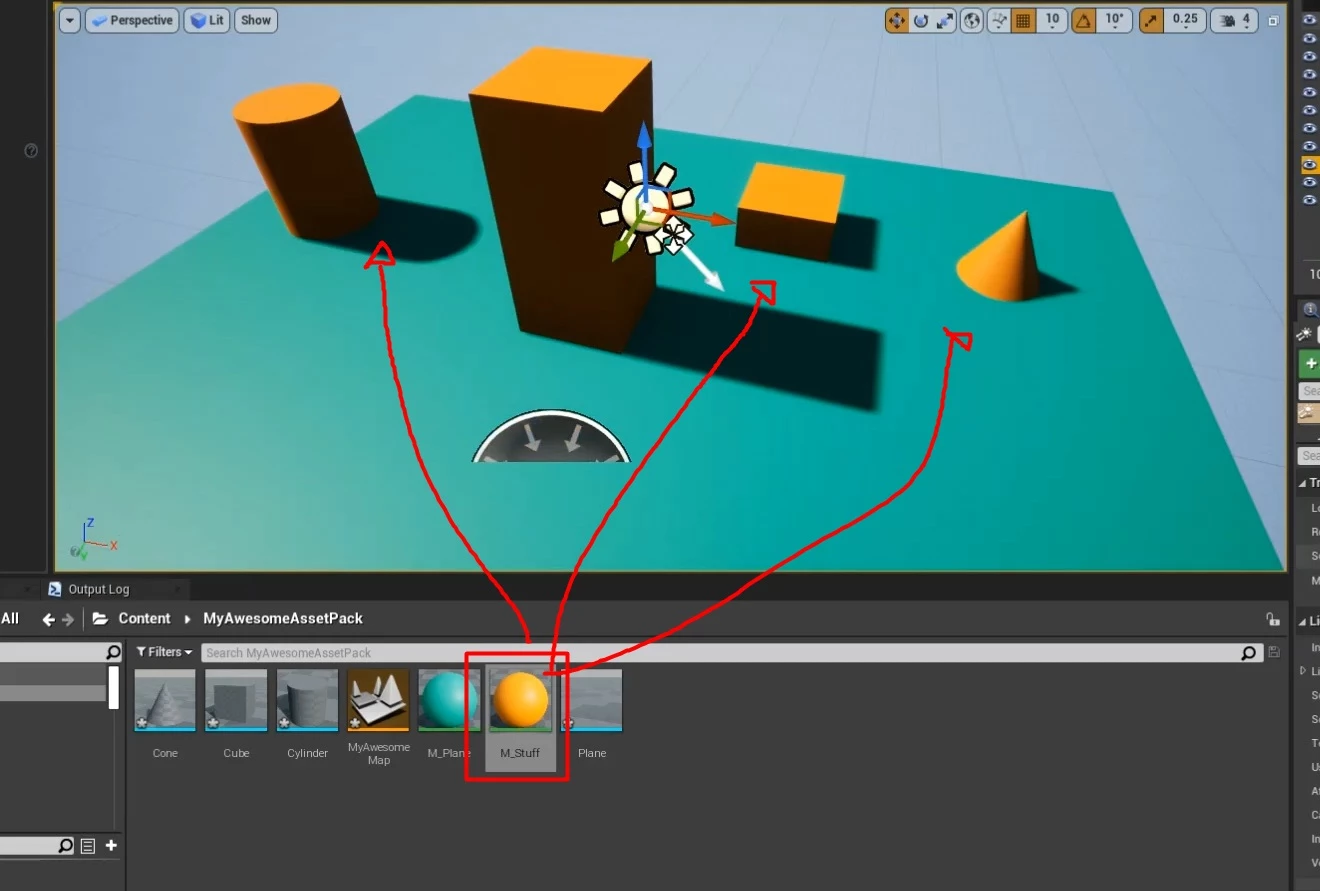
You can create a new Material and use it to paint these meshes as well:
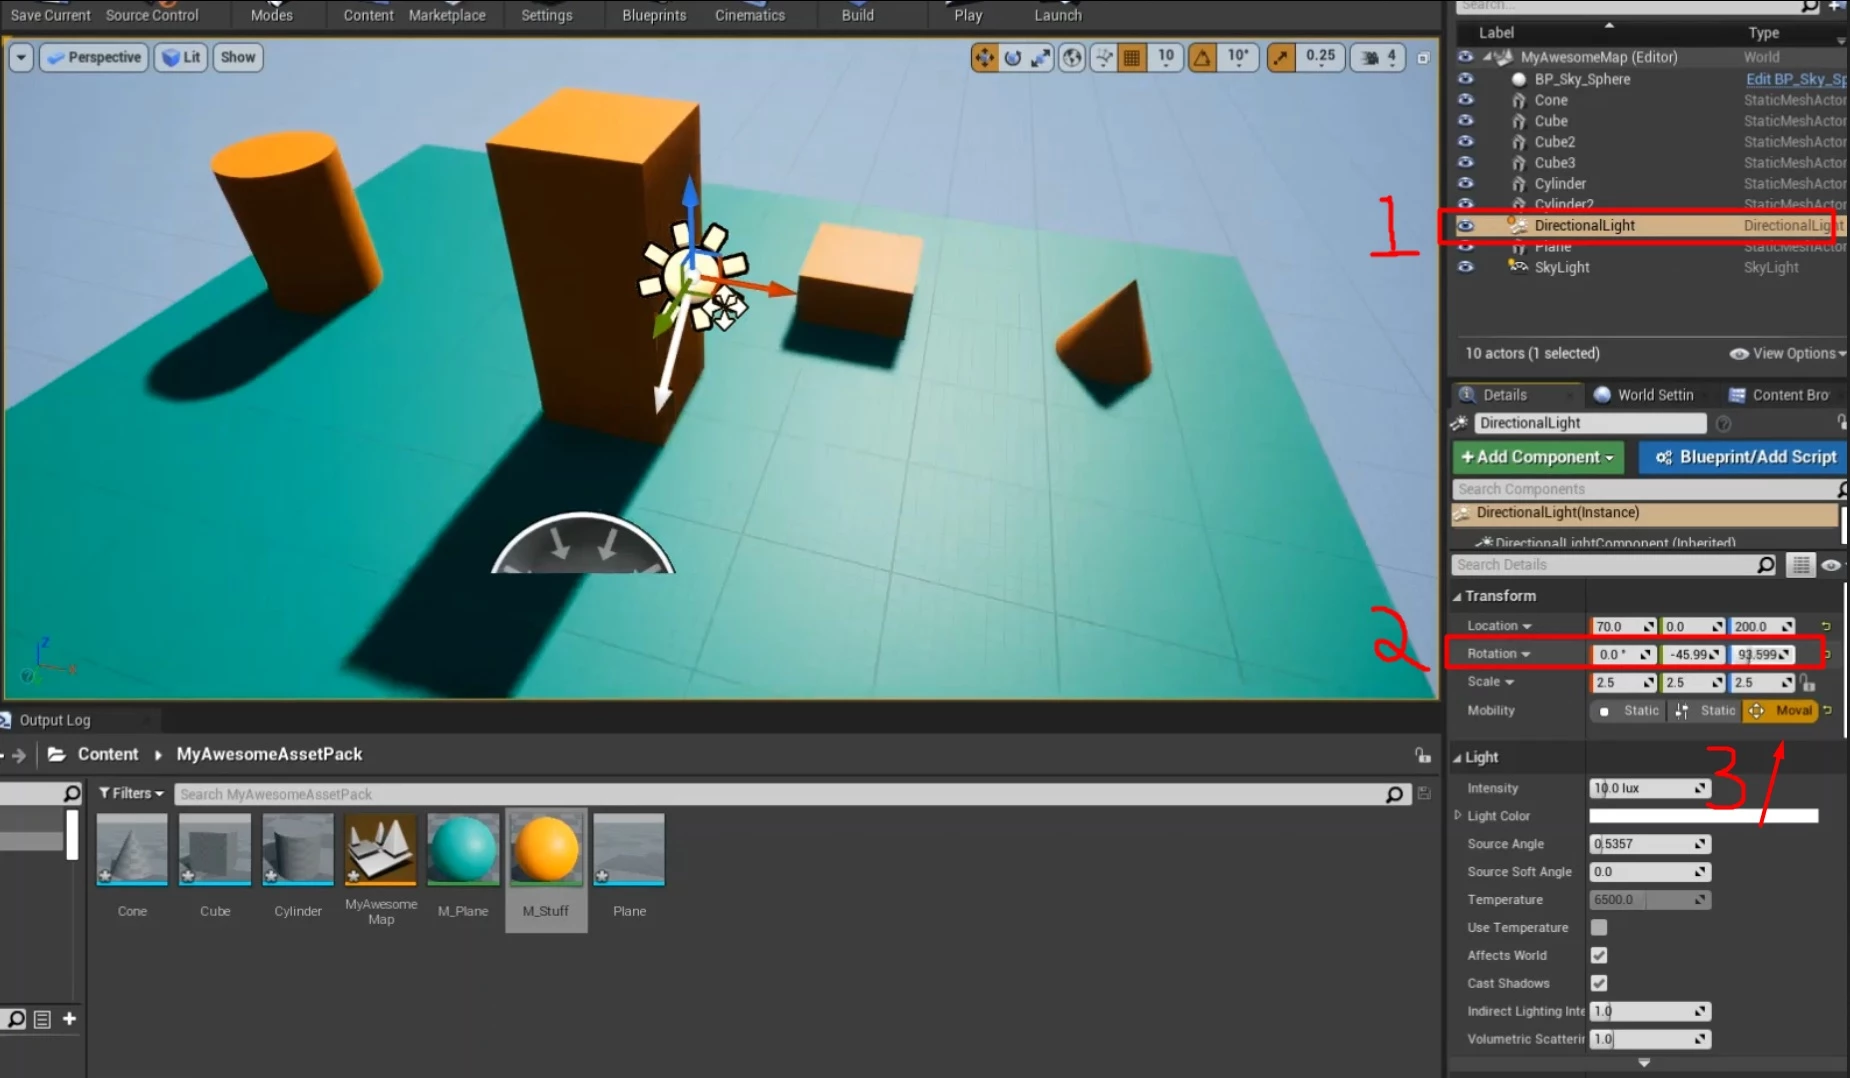
If you (1.) select the Directional Light, you can change it’s (2.) Rotation, also, remember to set it to (3.) Movable, so it’s shadows work in Real Time, feel free to tweak the light as you want, including it’s Color and intensity:
When you are fine with it, move your camera to see the whole map and take a screenshot of it, we will use that for a Thumbnail afterwards (save it anywhere with the same name as your Map as .webp, in our case: MyAwesomeMap.webp):
And we are done! Save everything and let’s export it!
Exporting the Map
After you completed all steps, you can export them into nanos world! Please refer to Exporting & Cooking your Assets docs page before proceeding.
Configuring the Asset Pack
After you cooked your assets and copied the generated folder into your server's Assets/ directory. It's time to configure the Asset Pack! For that please refer to Configuring your Assets.toml docs page before proceeding.
Now that you created your Assets.toml and configured the unreal settings, make sure you set up your Static Meshes properly in the [assets.maps] category, like that:
# maps
[assets.maps]
    MyAwesomeMap = "MyAwesomeMap"
This way we can load it through Config.toml!
Adding a Thumbnail
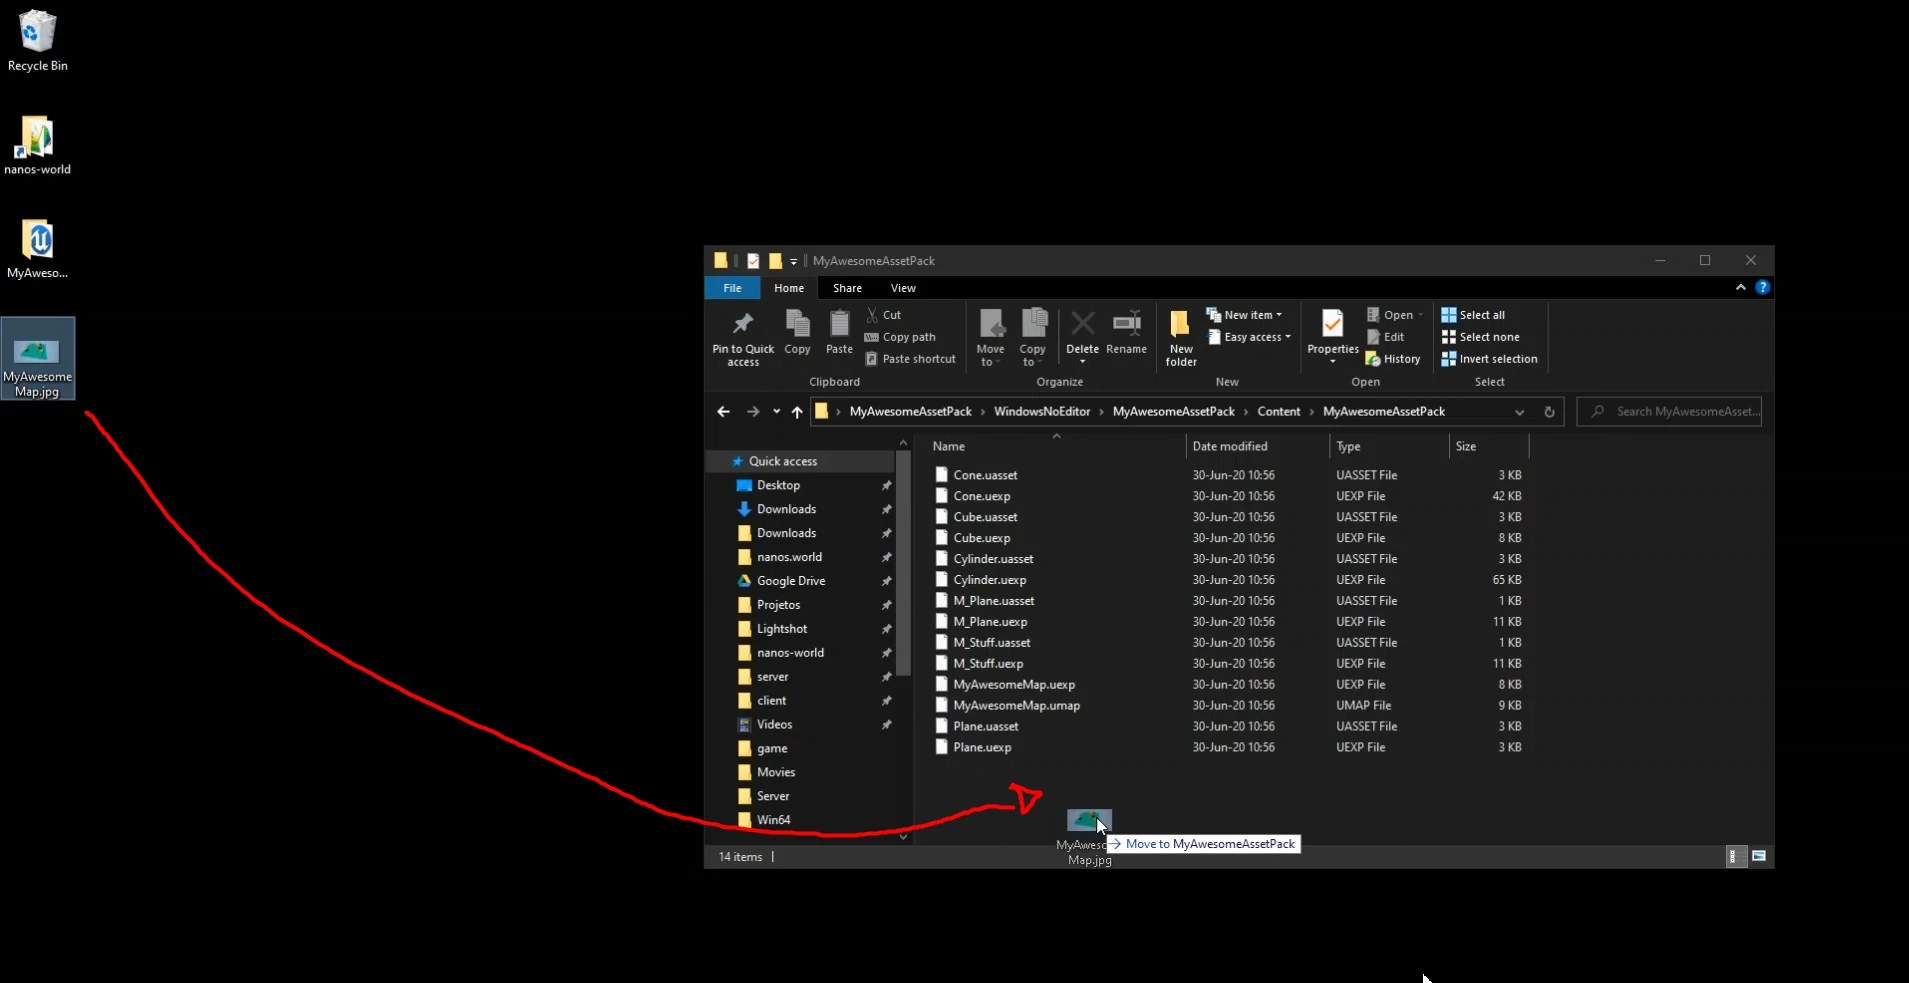
To add a thumbnail to your map, copy the .webp image into the same folder as your map .umap file.
In our case, our .umap is at the root, so we just drag it there:
You can now just start the New Game with the Sandbox package selected and VOILA! Your playable new map made from scratch!
Configuring your Map
Also it is possible to add a Configuration File, Custom Data and even an exclusive Package (scripting) for your map! Please refer to Map Script and Configuration for more information!