Static Meshes
How to export and use Static Meshes from Unreal Engine into nanos world
In nanos world Static Meshes are mainly used for Props and StaticMesh entities.
This guide will go through all aspects of importing, configure the materials, set up the collisions and create Thumbnails for Static Meshes. Also some additional tips for further improving them.
Please refer to Unreal Engine Static Mesh Documentation for more information on how to import a .FBX into Unreal, how to optimize it and so on. There are also thousands of tutorials regarding importing a .FBX from Blender (or other Modeling Tool) into Unreal Engine.
Getting Started
Before proceeding, please make sure you read Creating & Importing Assets Guide.
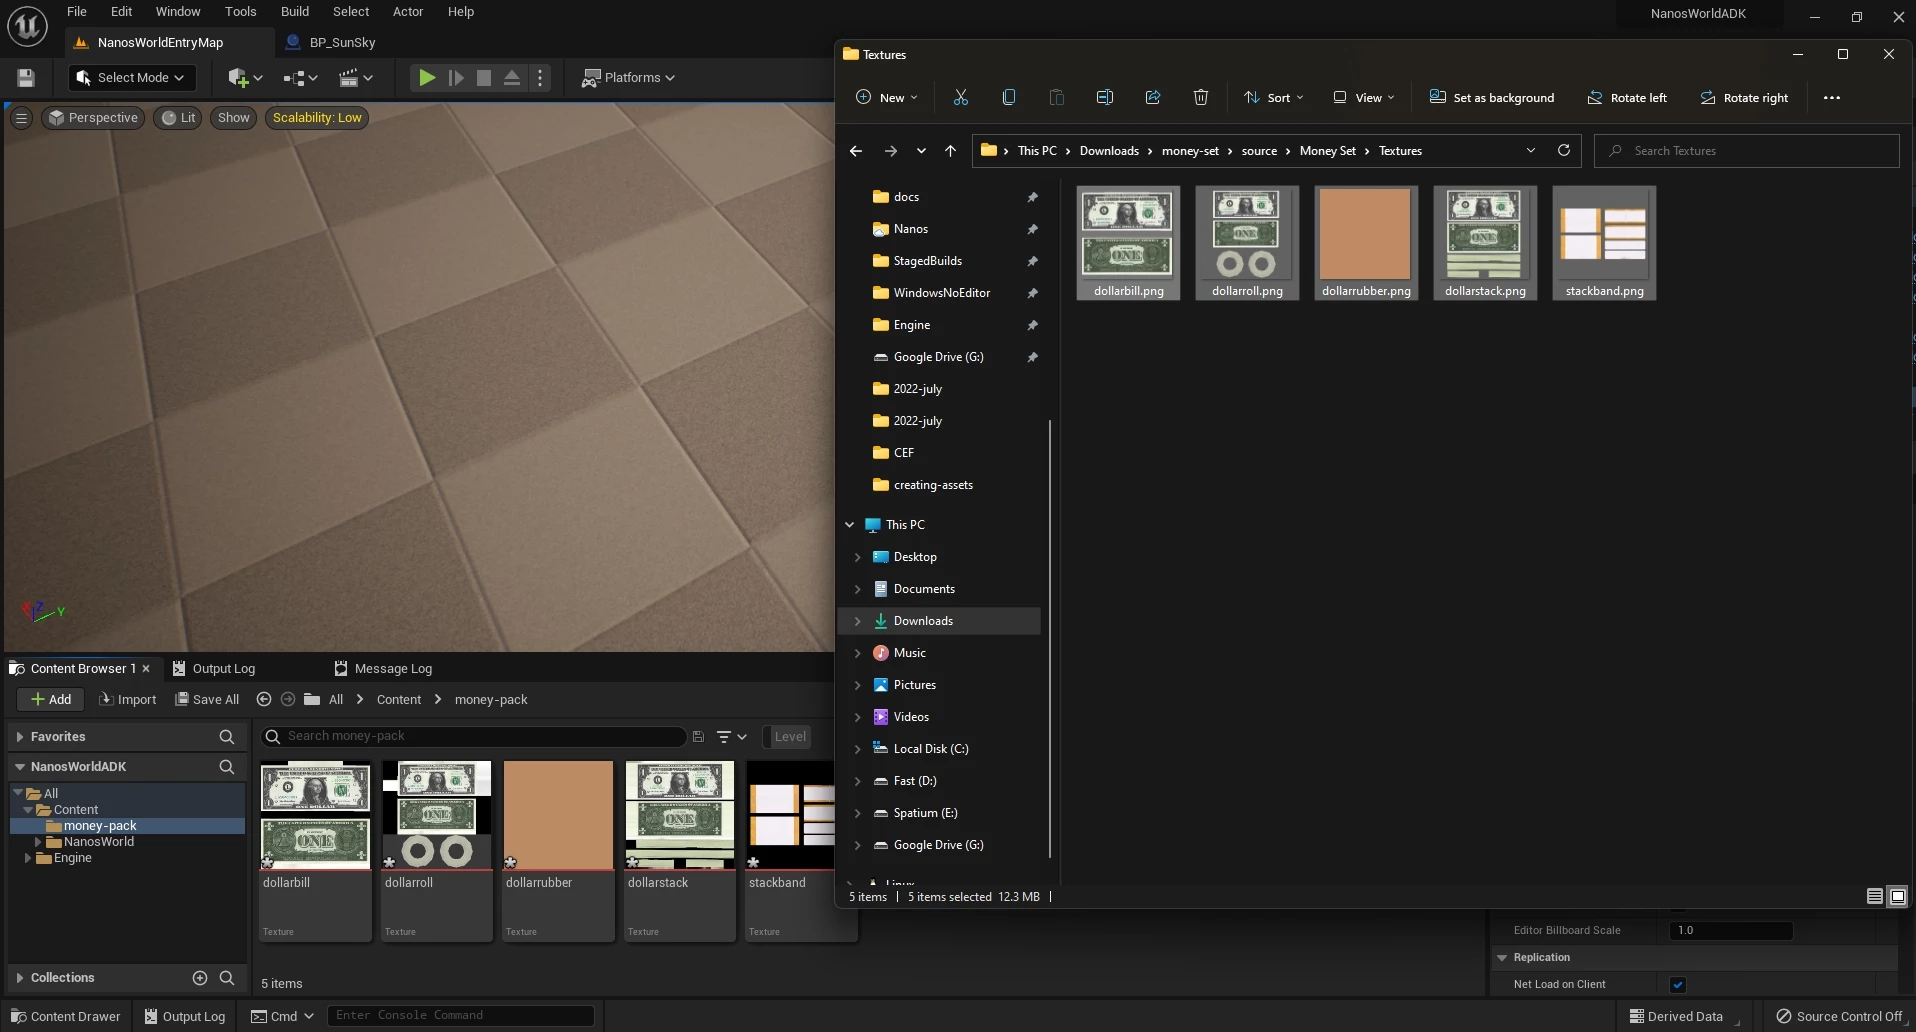
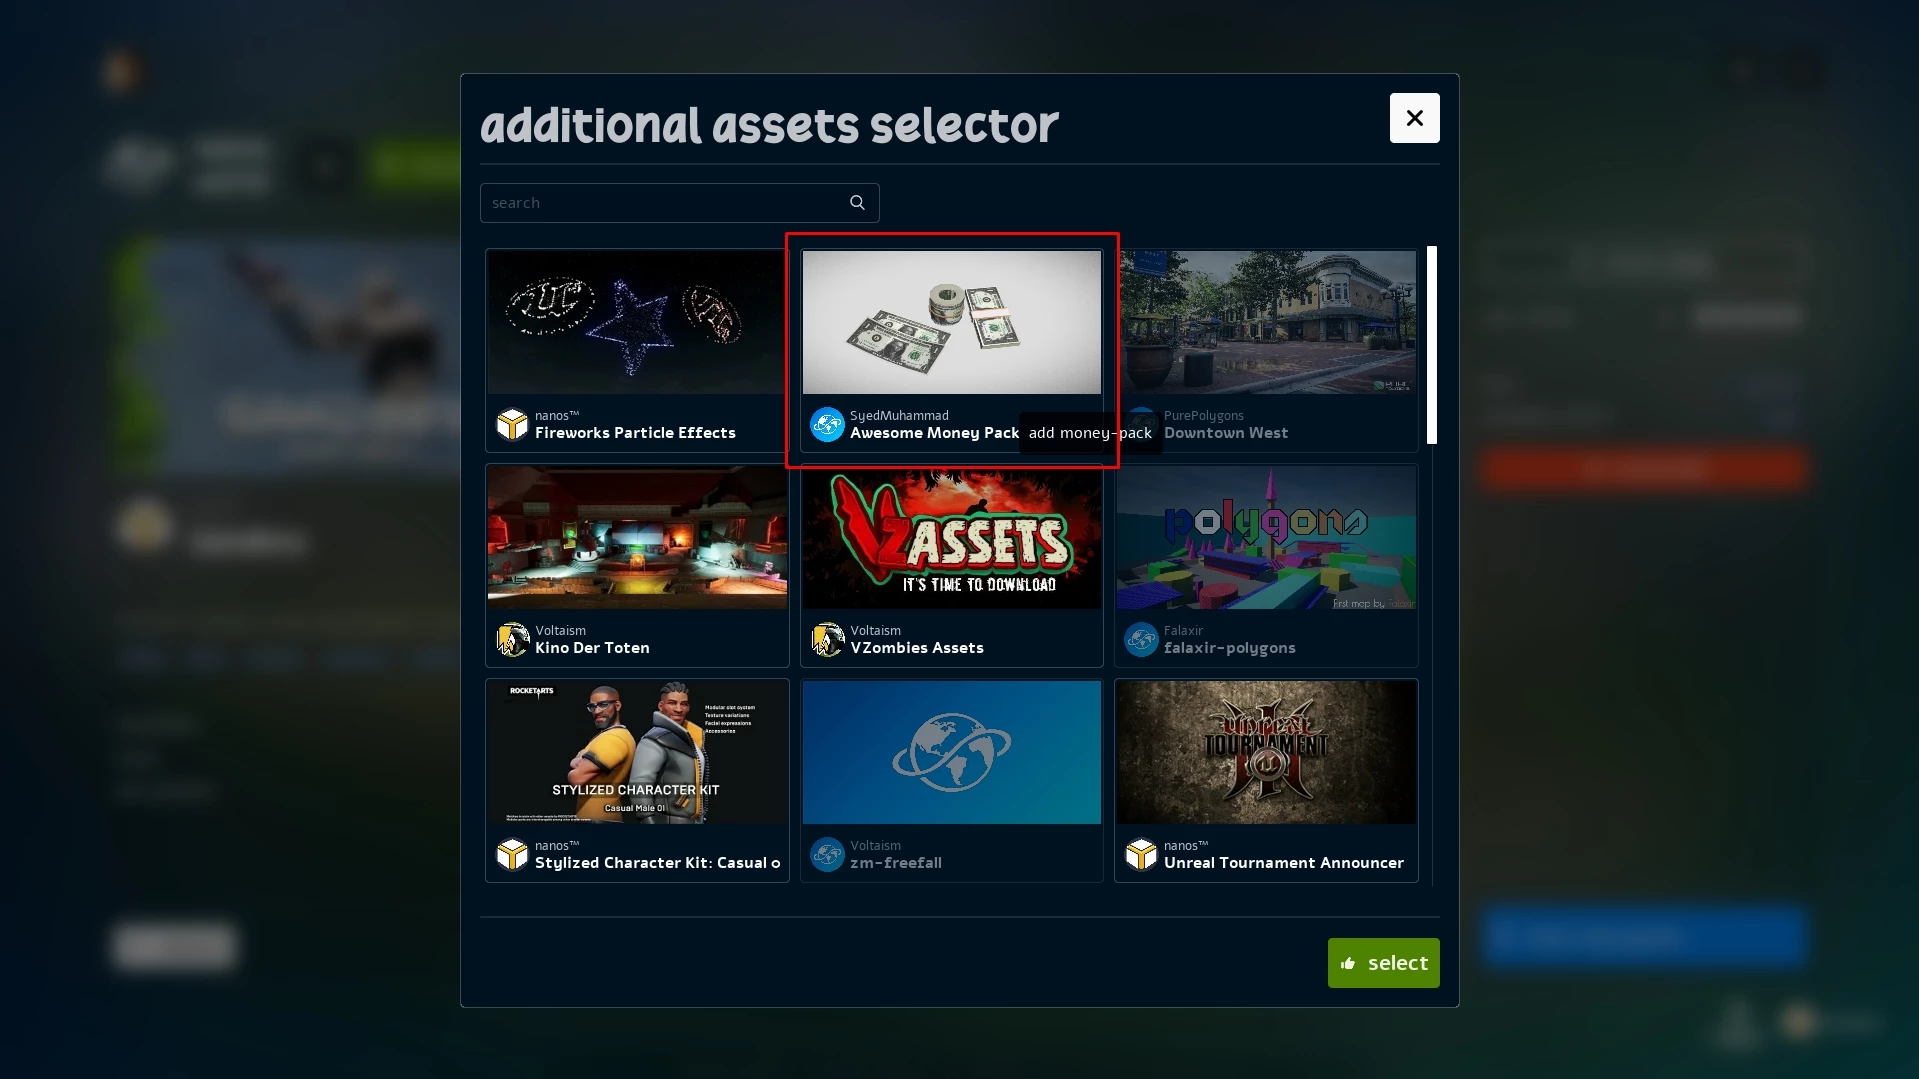
For this example, we are going to import this Money Set meshes into nanos world. We've downloaded and extracted it, and identified the .FBXs and .PNGs to be imported.
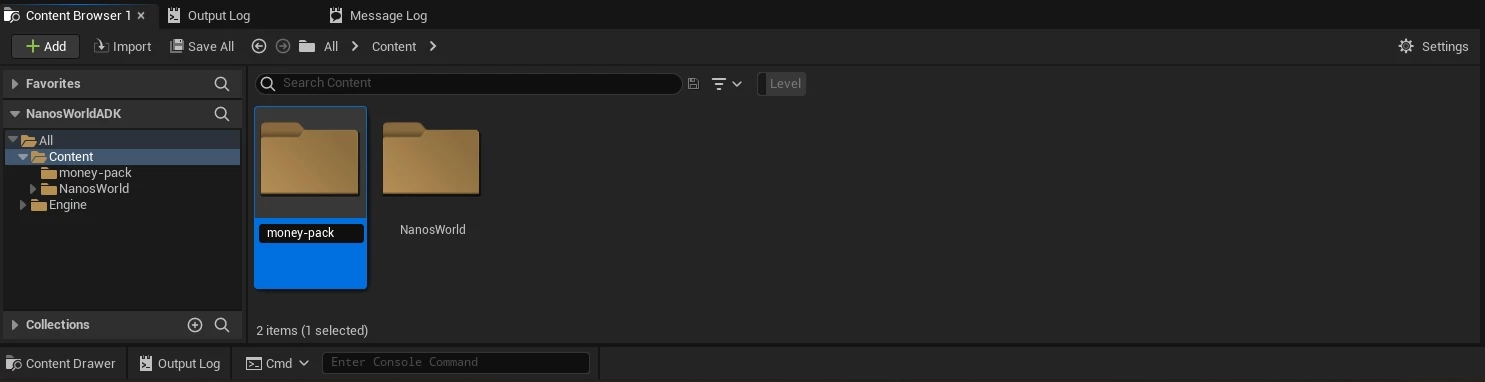
The first step is creating a new folder at the root of your Assets Development Kit Project, we will call it money-pack/. This will be our Asset Pack folder, all files must be imported inside this folder:
Importing the Textures
Then, let's import the textures. For that, we can just drag'n drop them inside our money-pack/ folder:
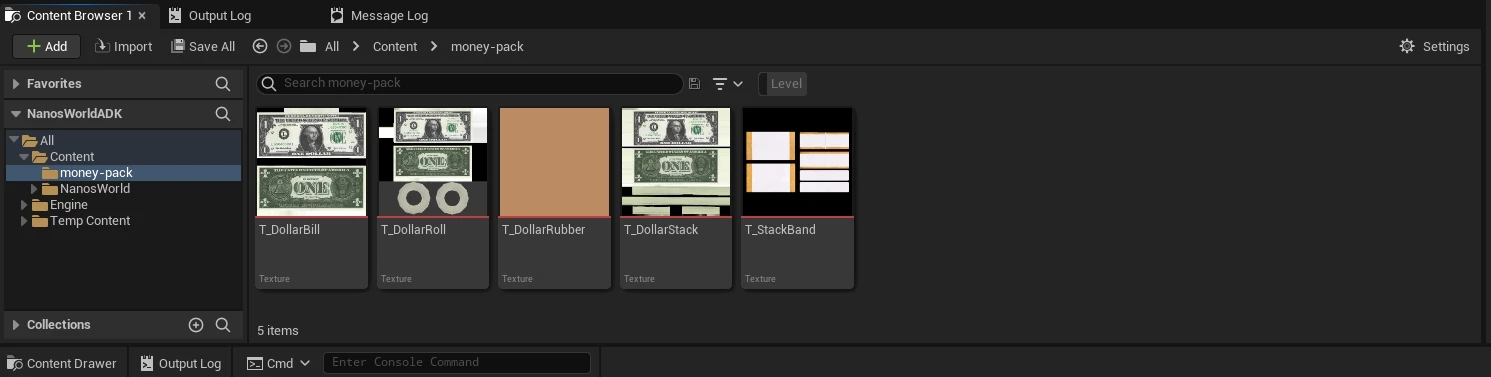
It is good practice to rename the files you imported, so we renamed it to PascalCase with T_ prefix:
Importing the Static Meshes
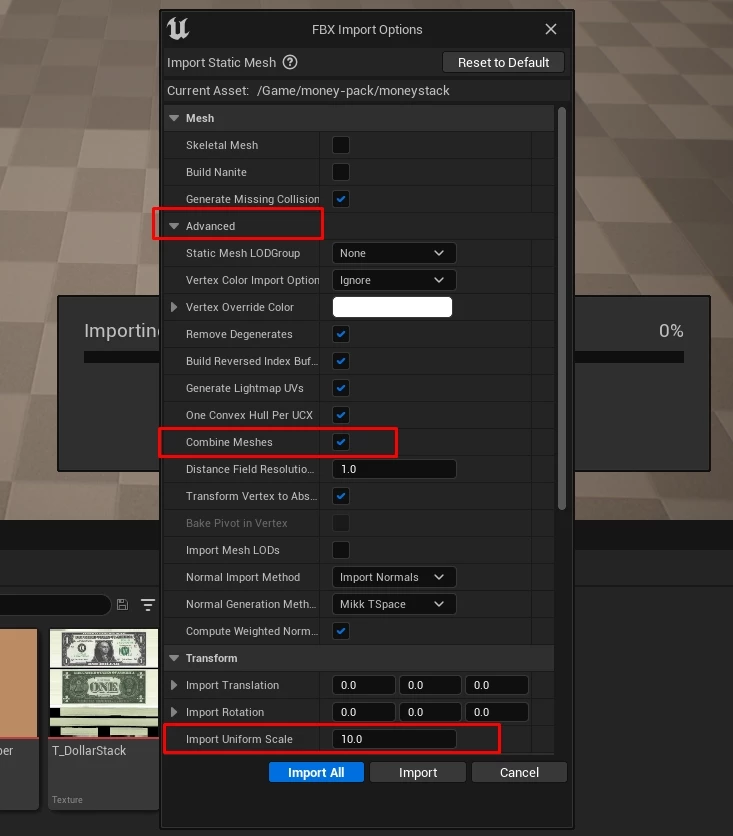
The second step is importing the .FBXs. For that we can just drag'n drop them inside our folder as well. When we do so, a Popup will appear.
Pay attention to some settings in there, some meshes come in a very small or big sizes so we need to adjust it at the time of import. Also it's smart to select "Combine Meshes" (under Mesh -> Advanced) to merge all meshes inside that .FBXs into an unique StaticMesh.
In our case, the original money is small, so we multiply the scale by 10x.
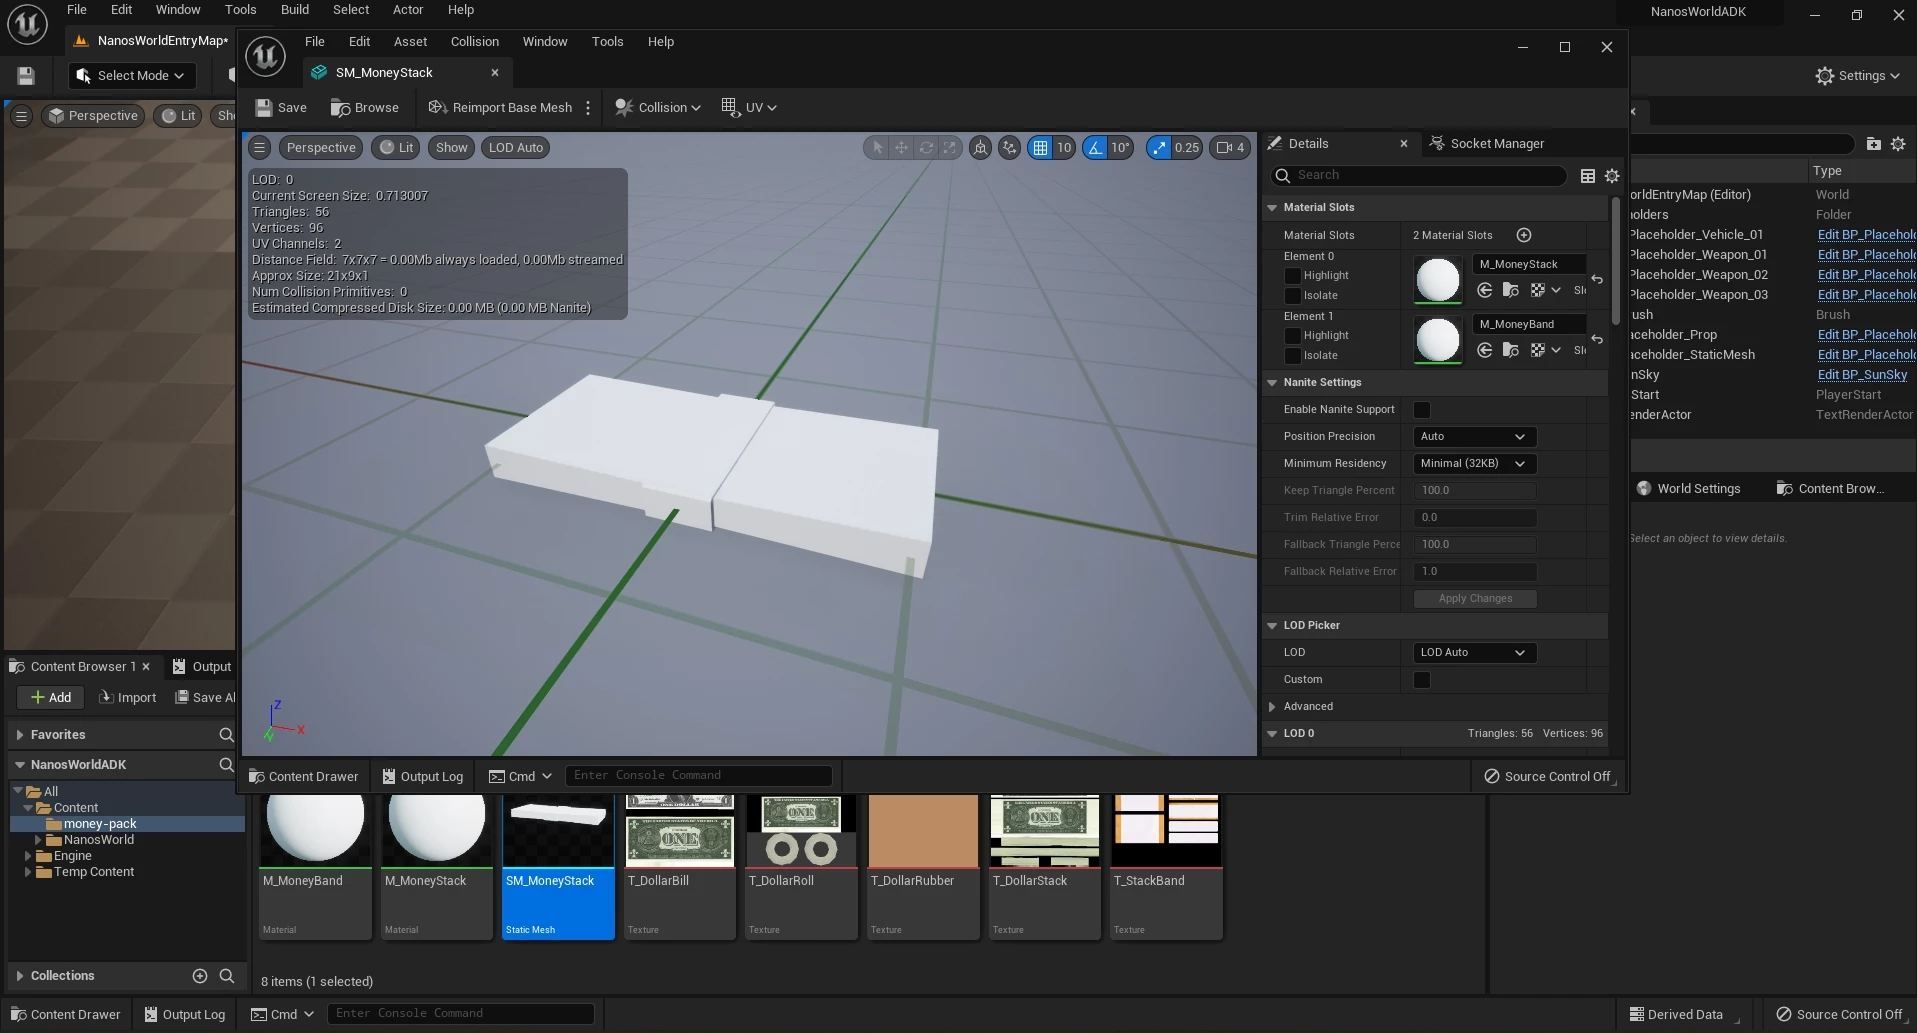
After imported, we renamed it to SM_MoneyStack as well.
Setting up the Materials
Note that some Materials have been created automatically. If you open your Static Mesh you will notice they are white.
We need to configure the Materials to use the Textures we imported before!
Some meshes when imported, can handle all Materials and Texture links automatically! It depends on how they were created and exported from the Modelling tool.
For that, let's open our Material and drag the correspondent texture into it:
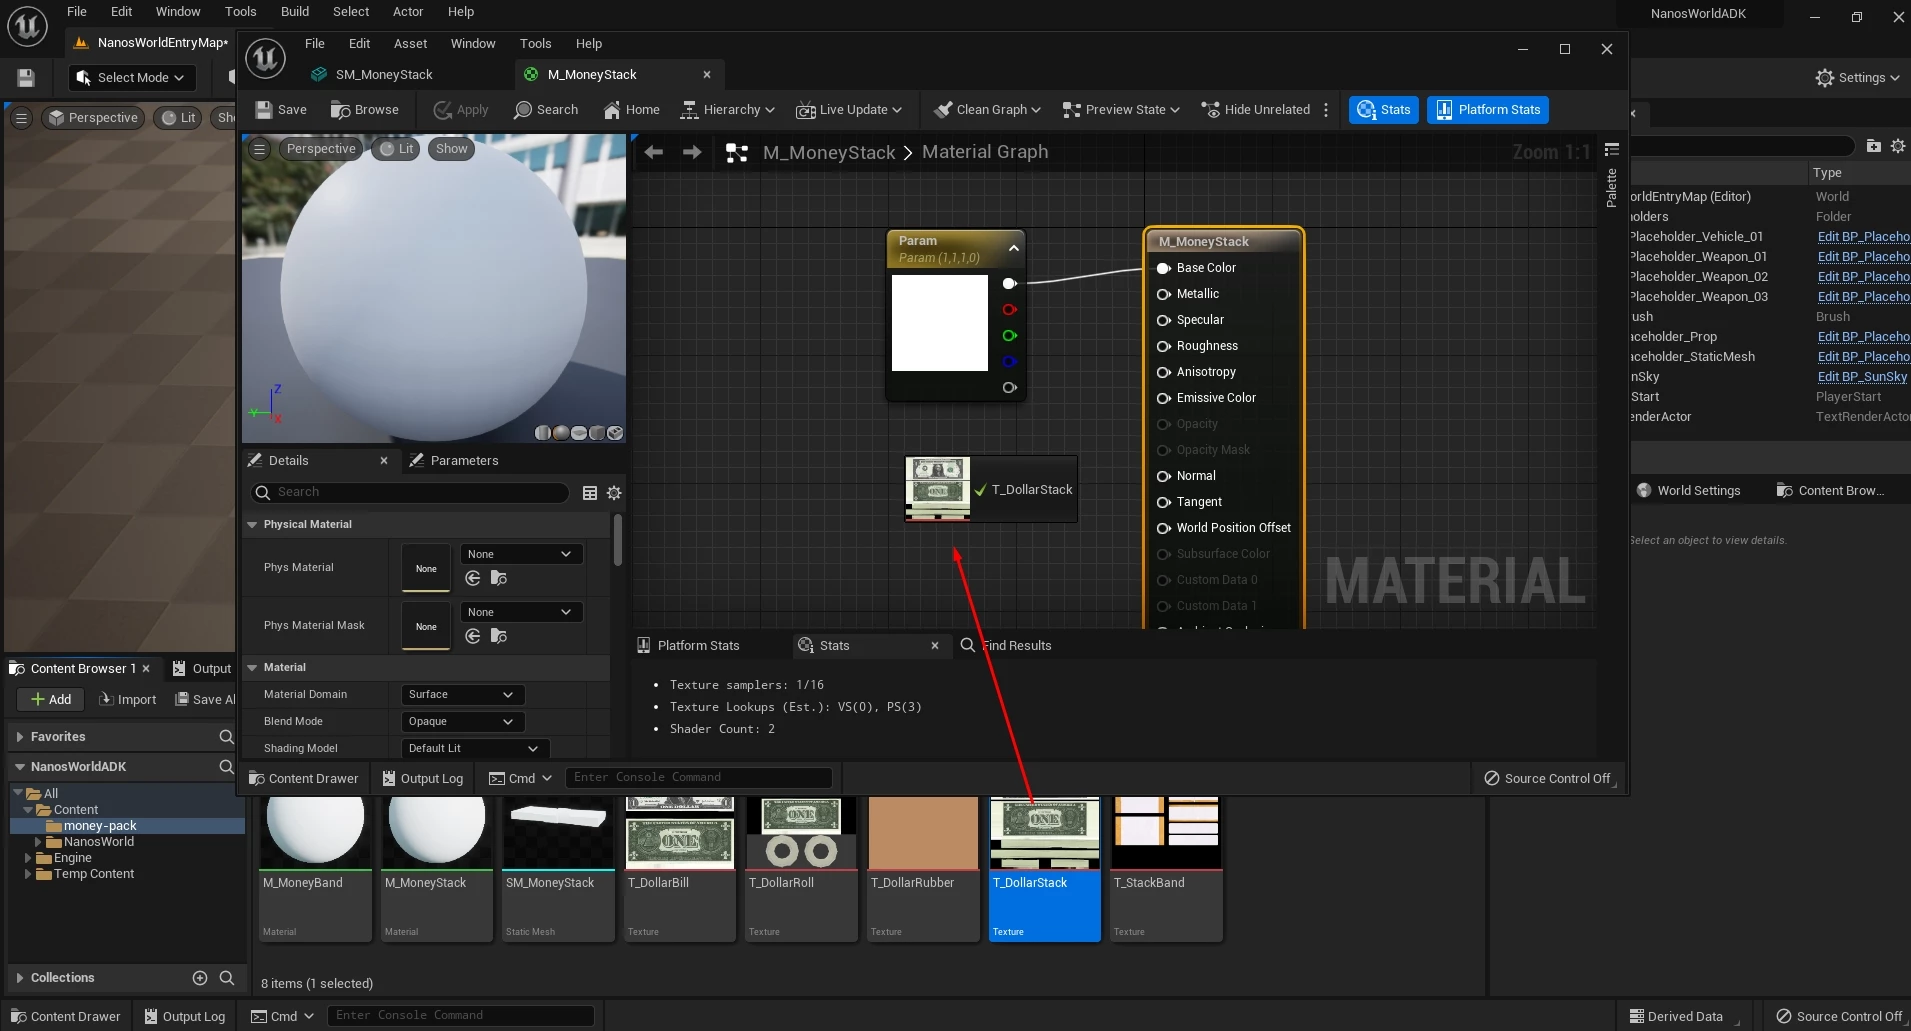
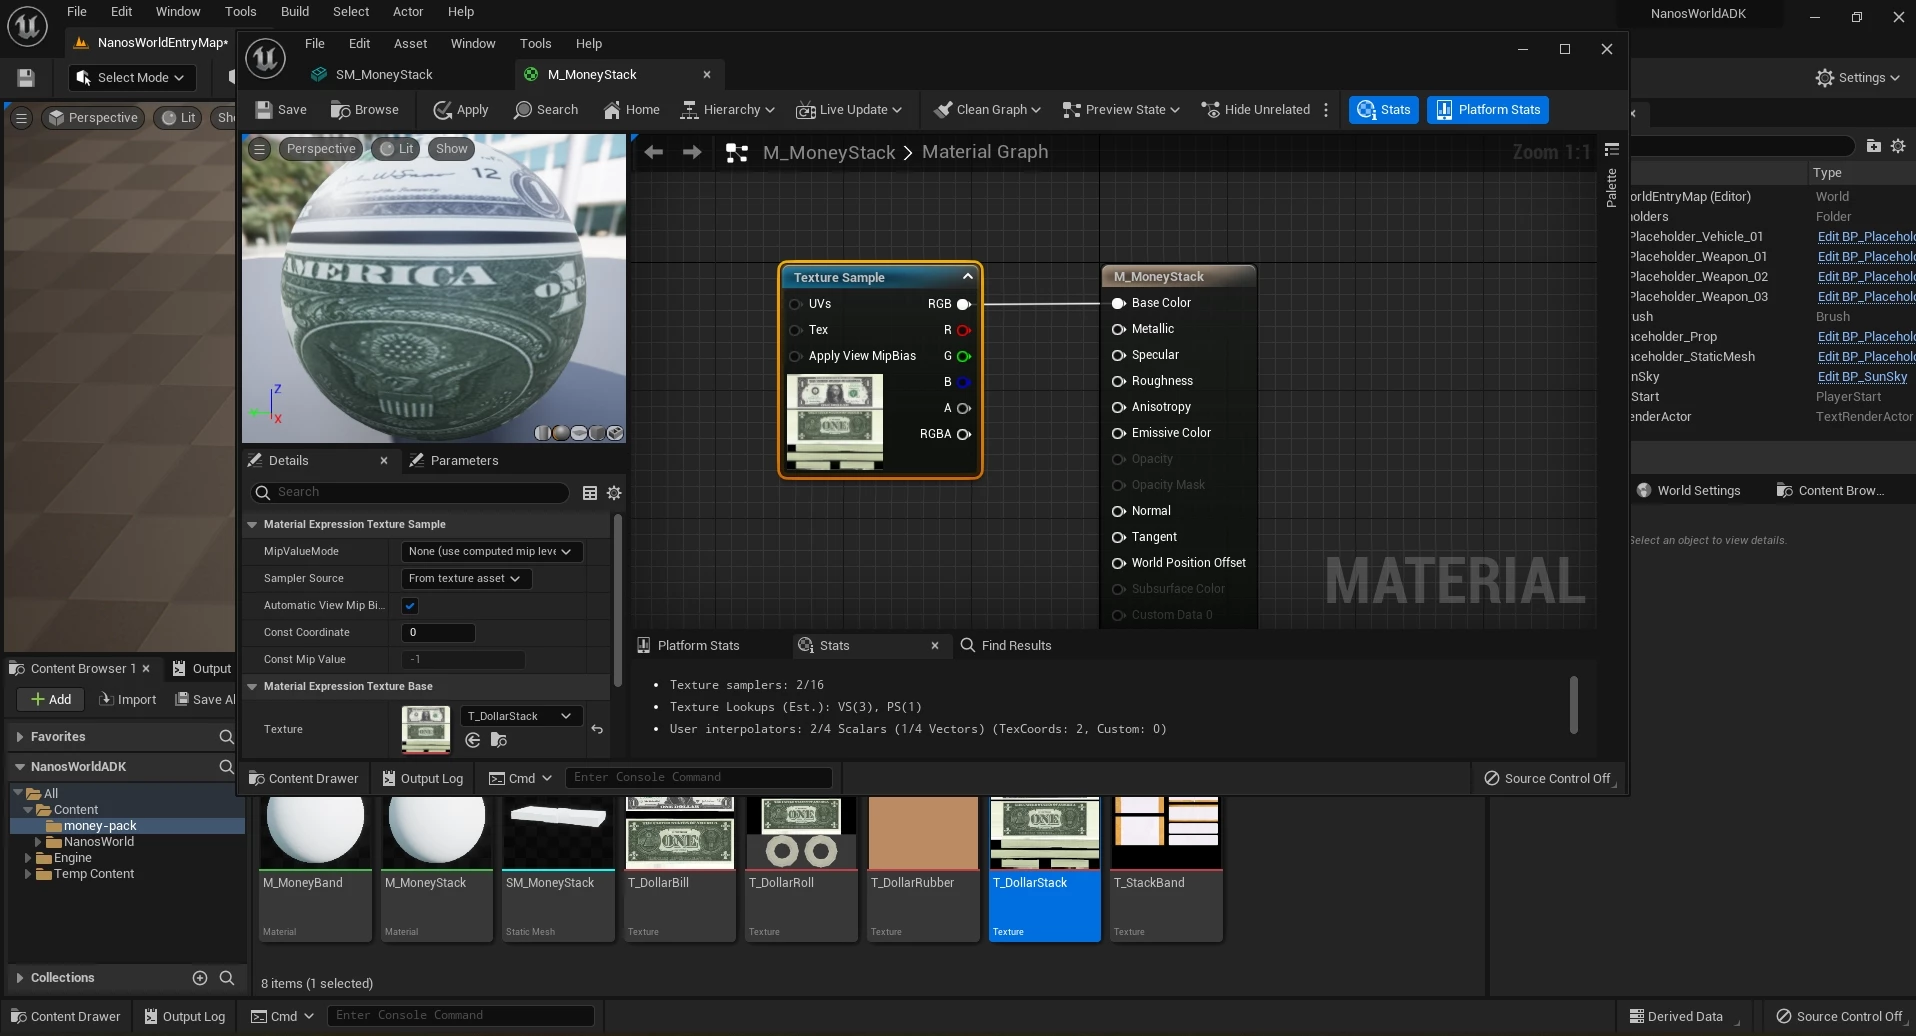
And then plug the texture into the Base Color pin:
You can configure other Materials pin as well. Unreal uses PBR which means we can set lots of parameters to make the Material look like as much realistic as we desire!
Also, some meshes come with other Textures besides the base color as well, for example Normal Maps, Metallic and Specular, which you can plug into your Material to make the PBR complete!
After setting up all materials, our mesh is now fully colored!
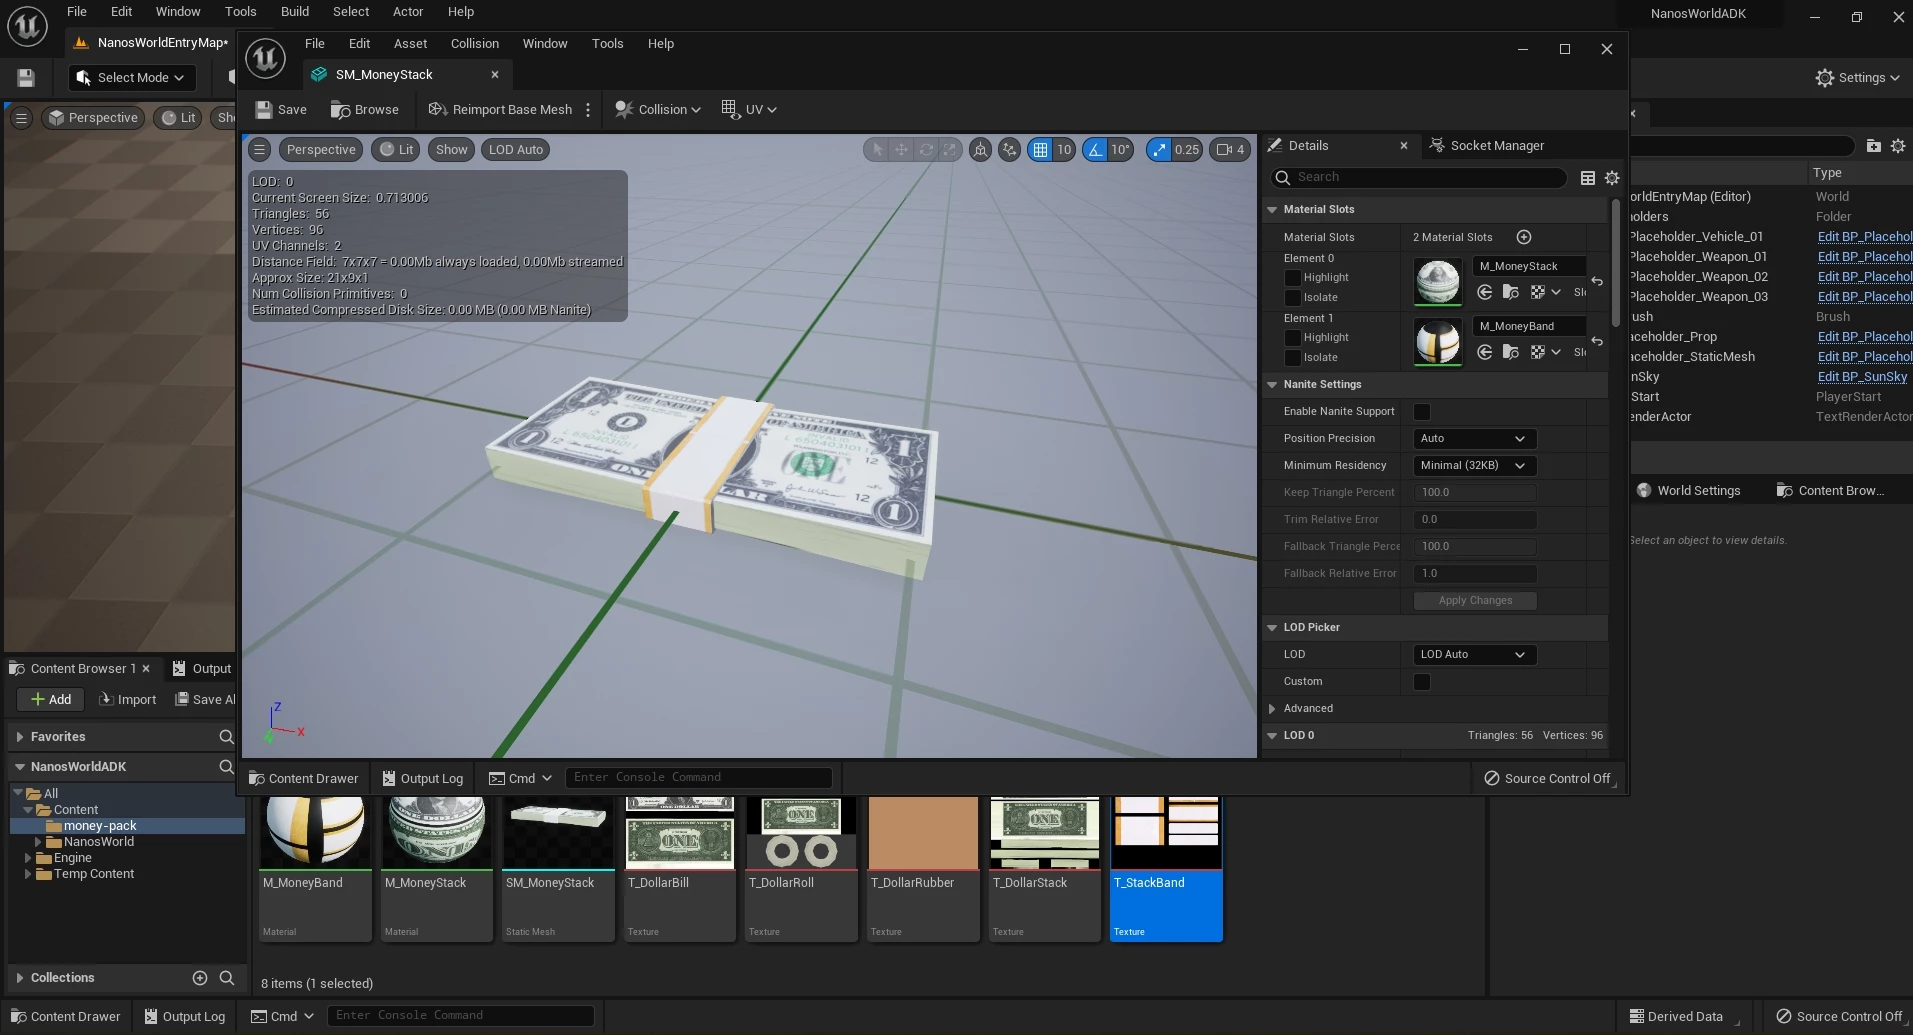
Setting up Collisions
Some meshes come without collision and we need to set it manually. As our money mesh is a cuboid it is easy to add collision to that!
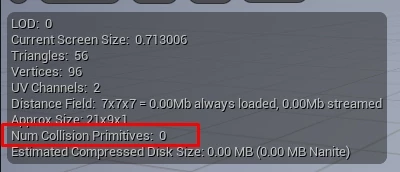
For that, we open the Collision tab and select "Add Box Collision" to automatically add a box collision wrapping the whole mesh.
You can delete all the collisions by pressing "Remove Collision". For more information please refer o Unreal Official Documentation.
And now it has collision! (If you don't see it, press Show -> Simple Collision to display the green wireframe around it).

Additional Tips
After you have created your meshes, you can read the following steps to improve them even further with this additional tips.
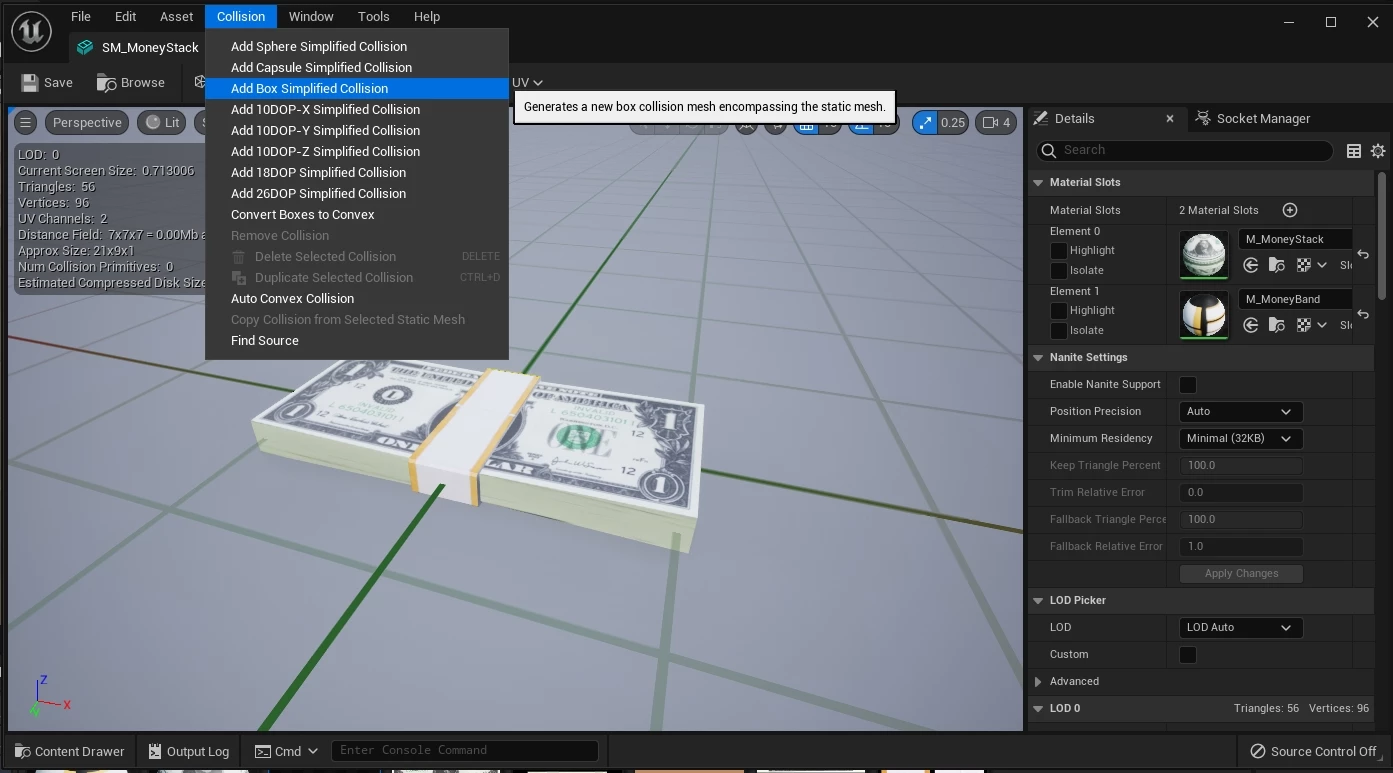
Setting the Physical Material
Physical Materials are used to define the response of a physical object when interacting with the world. Besides that in nanos world we use them to define the "hit sounds" of the objects, so it's nice and very easy to configure it.
For that you just need to open your material and select one of the (included in the ADK) Physical Materials, they are the ones initiated by PM_. For this example we are going to use "Wood":
Reducing Texture Size
Textures are one of the assets that take the most disk space. The way Unreal compression deals with it, they have a fixed size depending on their dimensions and it is smart to configure your textures or even limit their sizes to reduce their disk sizes.
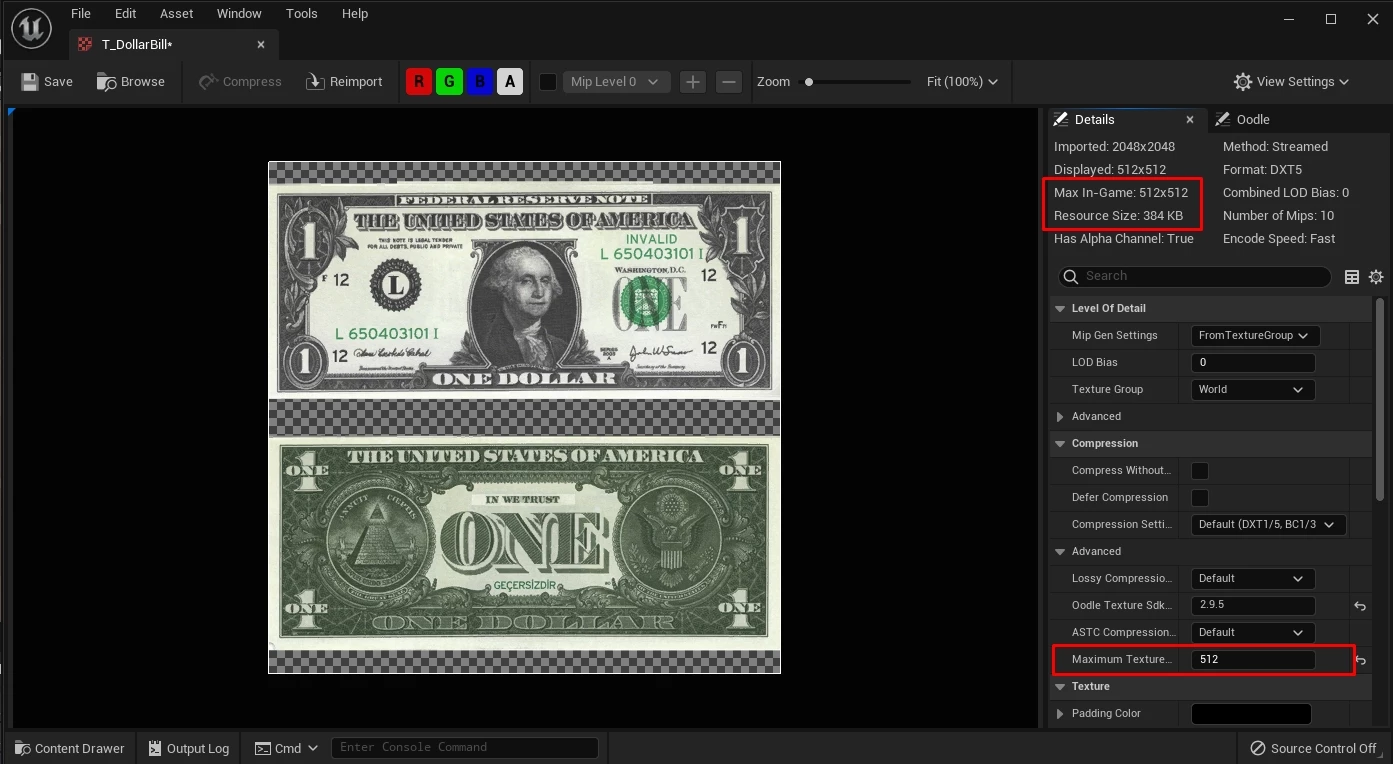
As you can see our money texture is really huge (2048x2048) taking up to 5MB in disk space (and RAM when playing):

As our object is small, we can limit this size to 512x512 and reduce it to 380 KB. It is a reduction of over 90%!
If you have bigger meshes, it's not recommended to reduce their size, otherwise the mesh will look like with bad quality.
Setting up LODs
Level of Details (LODs) are the way Unreal automatically improves the performance for distant objects. Unreal provides an easy tool to generate LODs automatically for your Static Meshes.
For that, open your Static Mesh and in Details panel search for Lod Settings -> Number of LODs. We recommend setting it to 3:
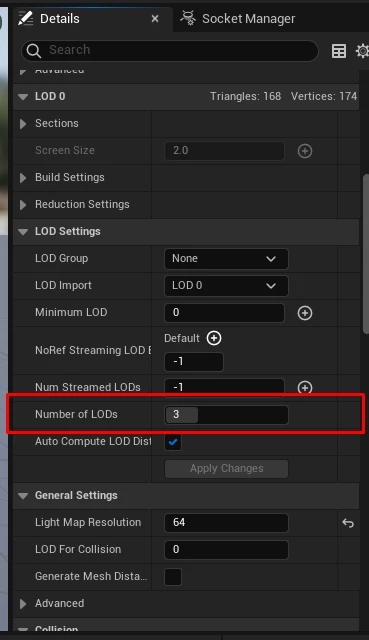
This way Unreal auto generates LODs which are changed during gameplay to reduce the quality of the distant meshes and improve the performance!
Generating Thumbnails
Thumbnails are conventionally used on Sandbox game-mode to display assets properly on it's Spawn Menu.
For that to work, you just need to take pictures of your meshes and put the .JPG with the exact asset name inside a Thumbnails/ folder at the root of your Asset Pack.
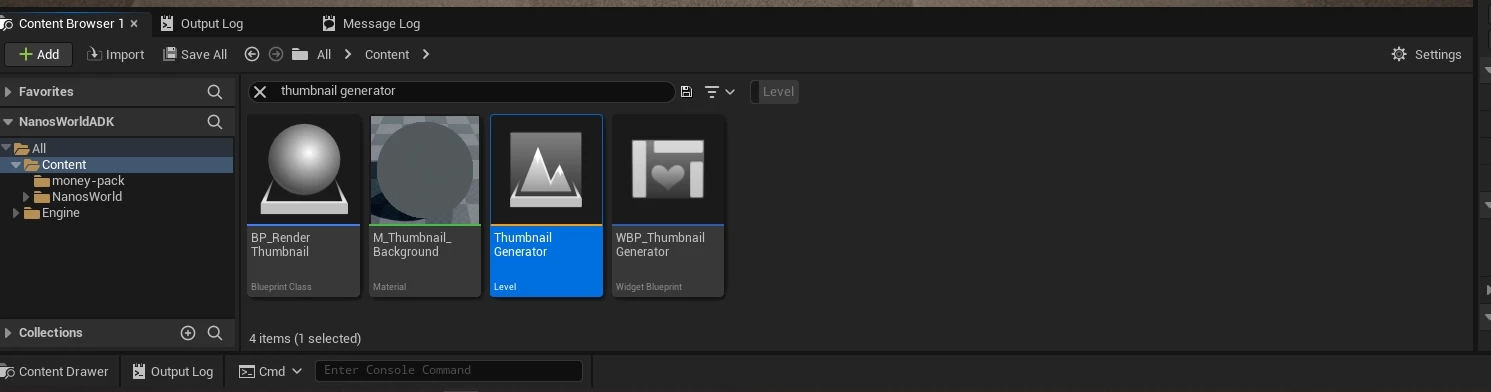
You can use the ADK Thumbnail Generator to generate them for you! For that open the ThumbnailGenerator map:
Press Play and configure the settings. In Search Folder you must set the folder of your asset pack: money-pack and in Output Folder you set the full path of the folder you want to export it, e.g. D:/money-pack/Thumbnails.
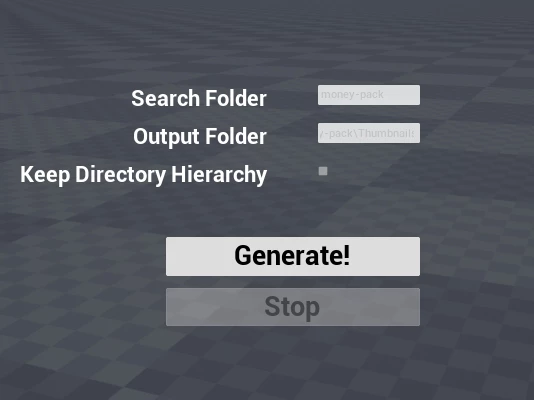
And press Generate! If you go to your output folder you will find all .JPG generated for your assets:

Now you just copy that folder inside your Asset Pack!
Exporting the Assets
After you completed all steps, you can export them into nanos world! Please refer to Exporting & Cooking your Assets docs page before proceeding.
Configuring the Asset Pack
After you cooked your assets and copied the generated folder into your server's Assets/ directory. It's time to configure the Asset Pack! For that please refer to Configuring your Assets.toml docs page before proceeding.
Now that you created your Assets.toml and configured the unreal settings, make sure you set up your Static Meshes properly in the [assets.static_meshes] category, like that:
# static meshes
[assets.static_meshes]
    SM_MoneyRoll = "SM_MoneyRoll"
    SM_MoneyStack = "SM_MoneyStack"
This way we can reference them through scripting and also we can test it on Sandbox game-mode!
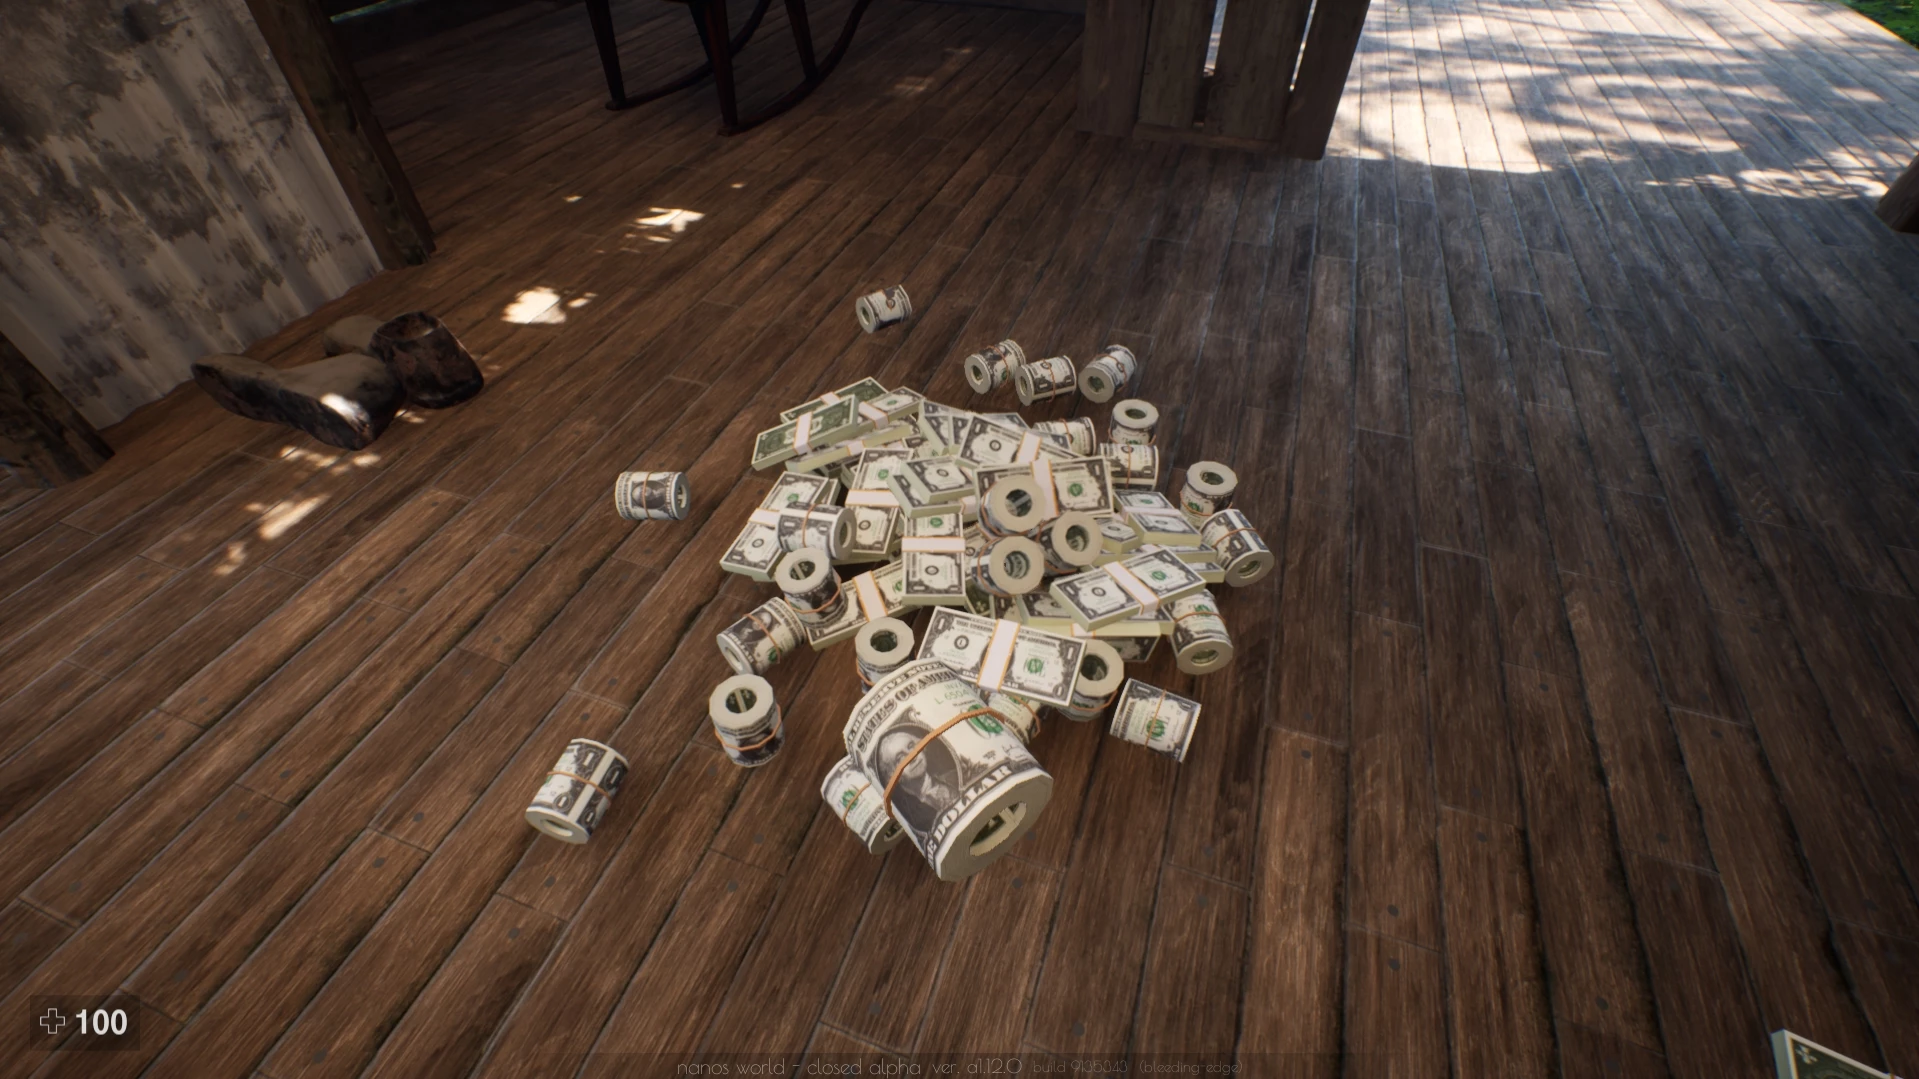
Time to Test!
After your configured your Assets.toml, it's time to test it!
Open nanos world, start a new game on Sandbox and add your new created Asset Pack to the assets list to be loaded:
When you hop in, open the Spawn Menu, under Props -> All Props you will find your static meshes in there!
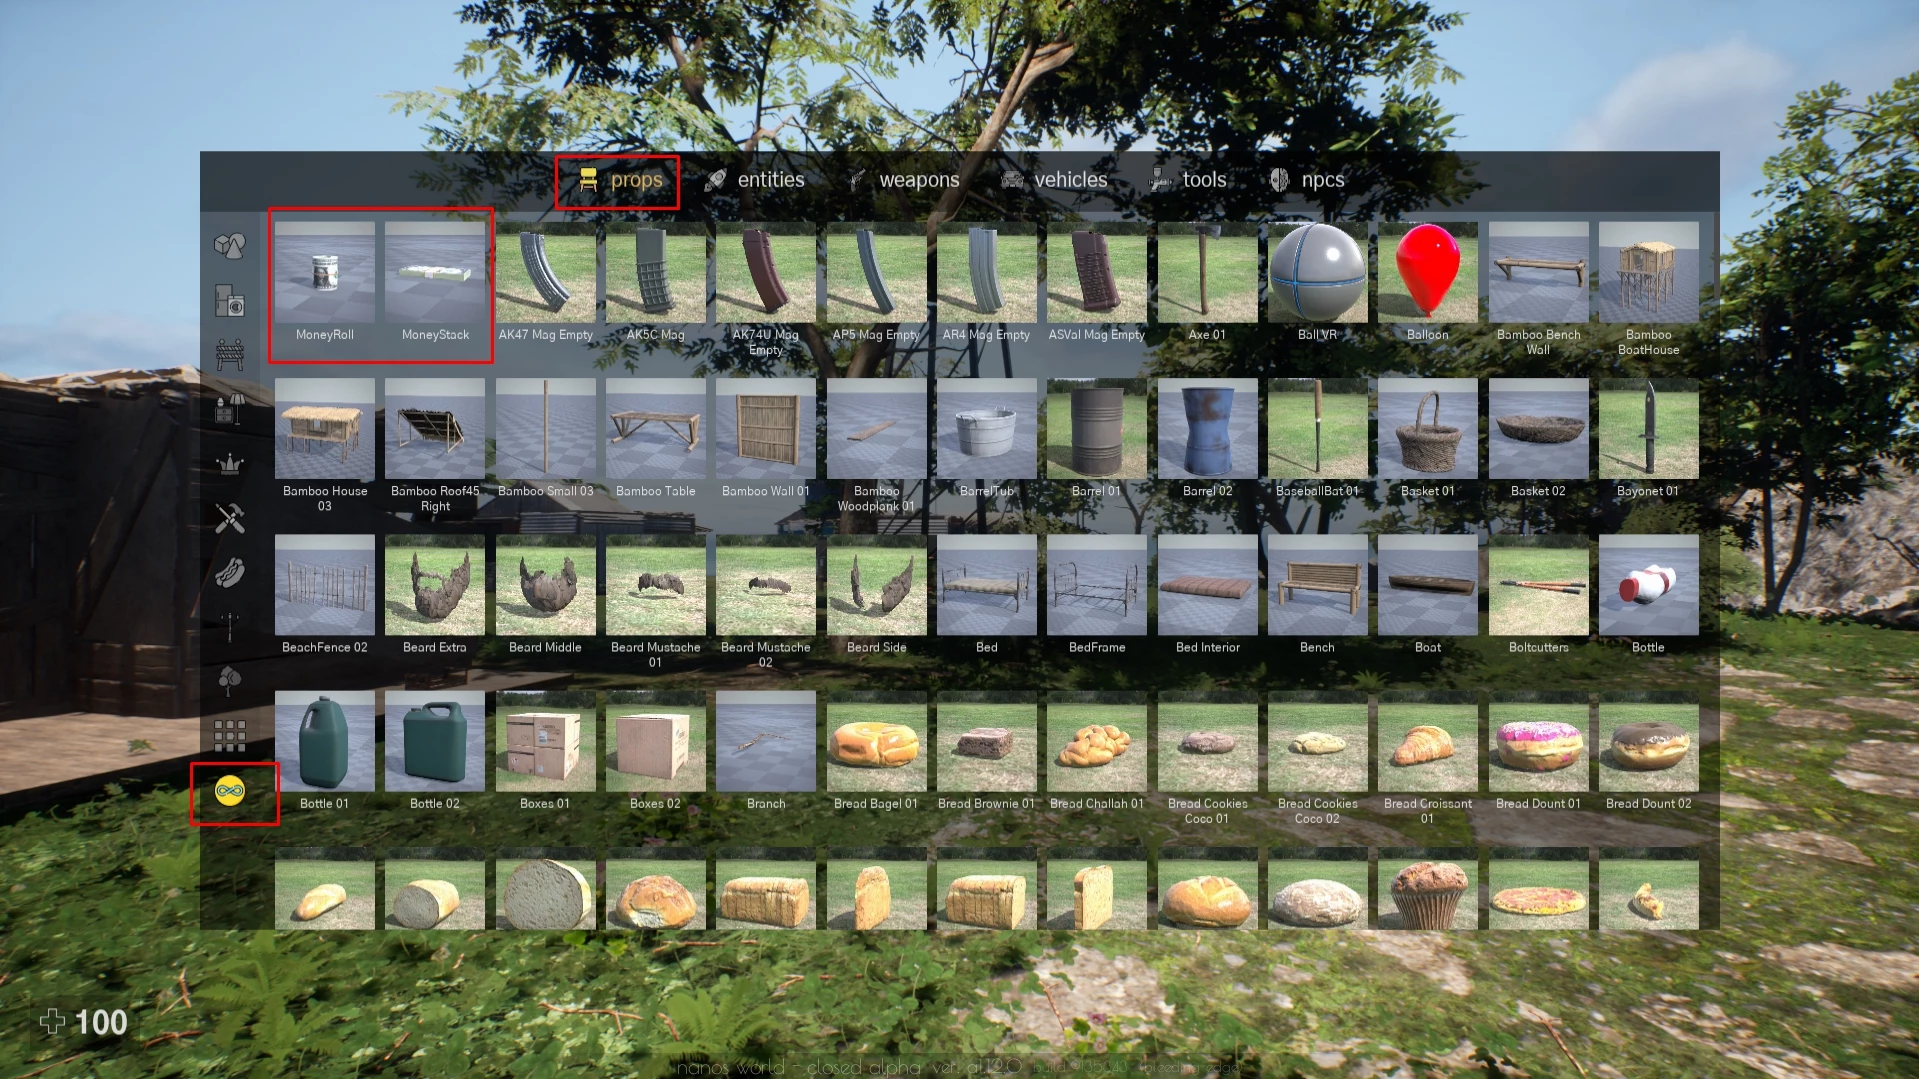
And voila! Your brand new static meshes you just imported!