Spawn Menu
How to extend and use Sandbox Spawn Menu.

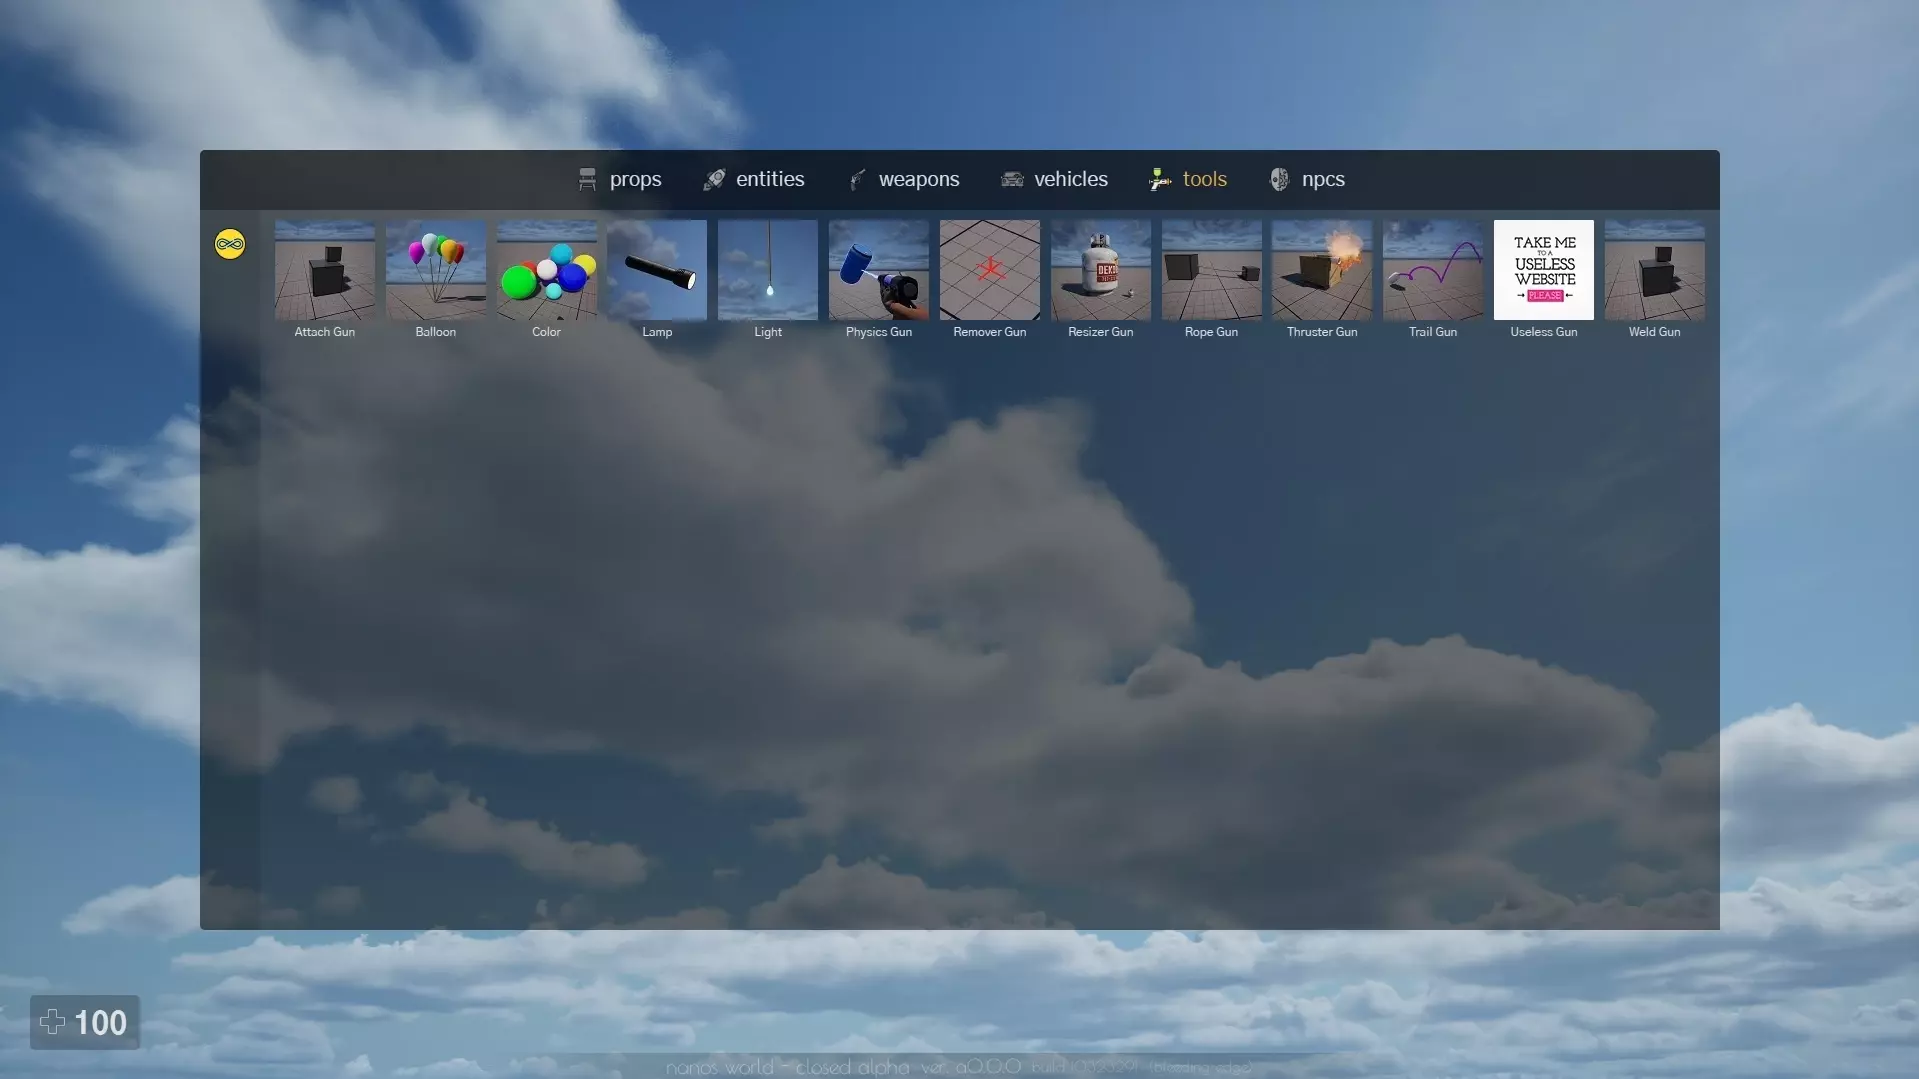
The Spawn Menu is a menu inside the Sandbox game-mode that provides ability to spawn Props, Entities, Weapons, Tools & etc in an easy and quick way. It is accessed by the default key Q and stays visible while pressed.
This menu (as well as the entire game-mode) is completely made through scripting, meaning it is possible to completely customize it with Lua and HTML/JS/CSS.
It has several pre-defined Tabs (Props, Entities, Weapons, etc), but you can add more through Lua. Each tab has one or more Categories to organize the items. Like tabs, categories can also be easily extended through Lua.
Items
Items are entries in the spawn menu that can be clicked to spawn some item or object. They must be defined on both Client and Server side to display on Spawn Menu and to be able to spawn correctly.
Adding Items Automatically
Most of the tabs provide ways to automatically adds items to Spawn Menu. For that you need to create new Classes inheriting from Base Classes and add some specific attributes to your custom class.
The Spawn Menu iterates all inherited Classes registered and adds them to it automatically (check Tabs section to see which Classes are added automatically to the Spawn Menu).
You just need to add the following properties to your Class when Inheriting it to make it display properly on Spawn Menu: name, image and category:
-- Inherits from Weapon defining custom values which will be read from Spawn Menu
Weapon.Inherit("AwesomeGun", {
	name = "Awesome Gun",
	image = "assets://nanos-world/Thumbnails/SK_FlareGun.jpg",
	category = "special"
})
This way your AwesomeGun will show up in the weapons Tab, under special Category with the image provided! On Server side you don't need to define any custom property to make it work 😉.
You can check default-weapons, default-vehicles or ts-fireworks-tools as examples!
Adding Items Manually
Some classes like Weapons, Character and Tools are automatically displayed in the SpawnMenu just by being inherited from that. But you can manually add items using the following exposed methods:
You must call SpawnMenu.AddItem from both client and server side. Each side has it's own parameters.
Client Side
On the Client side, we define how the Item will be displayed in the Spawn Menu, including it's label, tab, category and image.
-- Adds a new item to the Spawn Menu
---@param tab_id string         The tab to display this item
---@param id string             Unique ID used to identify this item
---@param name string           Display name
---@param image string          Image path
---@param category_id? string   The category of this item
function SpawnMenu.AddItem(tab_id, id, name, image, category_id?)
Example:
-- Example adding an Incredible Tool to spawn Menu (client side)
SpawnMenu.AddItem(
    "tools",			-- tab id
    "IncredibleTool",	-- unique id of the item
    "Incredible Tool",	-- name/label
    "assets://nanos-world/Thumbnails/SK_Blaster.jpg", -- image path
    nil					-- no category, will display at 'uncategorized'
)
Server Side
On the Server side, we can define how the item will be spawned, here we can create the "spawn function" for this item.
-- Adds a new item to the Spawn Menu
---@param tab string                Tab of this item
---@param id string                 Unique ID used to identify this item
---@param spawn_function function	Spawn function
function SpawnMenu.AddItem(tab, id, spawn_function)
Example:
-- Function which spawns an entity
-- The parameters location, rotation, tab and id will be automatically
-- passed by the Spawn Menu
function SpawnMyIncredibleEntity(location, rotation, tab, id)
    local my_stuff = MyEntity(location, rotation)

    -- configure stuff...
	-- my_stuff:SetSomething(...)

	-- We must return the spawned item from this function
    return my_stuff
end

Package.Subscribe("Load", function()
    -- Adds this to spawn Menu (server side)
   	SpawnMenu.AddItem(
		"tools",				-- tab id
		"IncredibleEntity",		-- item id
		SpawnMyIncredibleEntity	-- function which spawns and returns the item
	)
end)
Tabs
The Spawn Menu has the following tabs by default: props, entities, weapons, vehicles, tools and npcs.
props
By default, all StaticMeshes defined in the loaded Asset Packs will automatically appear on this tab and it's thumbnails will be loaded from the Thumbnails/ folder at the root of the Asset Pack, if it exists.
weapons
All Classes inherited from Weapon will appear in the weapons tab by default.
vehicles
All Classes inherited from VehicleWheeled will appear in the vehicles tab by default.
tools
All Classes inherited from ToolGun will appear in the tools tab by default. See Custom Tools to know how to create your own Tool Guns and make them appear in this Tab.
npcs
All Classes inherited from Character will appear in the character tab by default.
Adding new Tabs
It is possible to add custom tabs to the Spawn Menu, for that just call this client-side method from your Package:
---@param id string                Unique ID used to identify the tab
---@param name string              Label of the tab
---@param image_active string      Image path when the tab
function SpawnMenu.AddTab(id, name, image_active)
Example:
Package.Subscribe("Load", function()
    -- Adds a new tab
    SpawnMenu.AddTab(
        "consumables",
        "consumables",
        "package://your-package/food.png"
    )
end)
Categories
Each Tab has it's own Categories. By default they have the following ones:
- Tab props:
basic,appliances,construction,furniture,funny,tools,food,street,natureoruncategorized. - Tab weapons:
rifles,smgs,pistols,shotguns,sniper-rifles,specialorgrenades.
Adding new Categories
It is possible to add custom categories to the Spawn Menu tabs, for that just call this client-side method from your Package:
---@param tab_id string                Tab ID
---@param id string                    Unique ID used to identify the category
---@param label string                 Label of the tab
---@param image_active string          Image path when the category
function SpawnMenu.AddCategory(tab_id, id, label, image_active)
Example:
Package.Subscribe("Load", function()
    -- Adds a new category to Props tab
    SpawnMenu.AddCategory(
        "props",
        "low-poly",
        "low poly",
        "package://your-package/low-poly.png"
    )

    -- Adds a new category to Weapons tab
    SpawnMenu.AddCategory(
        "weapons",
        "world-war",
        "world war",
        "package://your-package/ww.png"
    )
end)